Crear y presentar un gasto de kilometraje a través de la aplicación móvil
ExFlow Travel & Expense es rápido y está diseñado para facilitar su uso. La aplicación móvil permite a los usuarios ingresar y presentar gastos de kilometraje para aprobación en solo unos pocos pasos.
Nota:* Antes de presentar un gasto de kilometraje, se debe asignar un vehículo al registro del empleado. Consulte Gestión de usuarios > Asignación de vehículos para instrucciones de configuración.
Crear una entrada de kilometraje
-
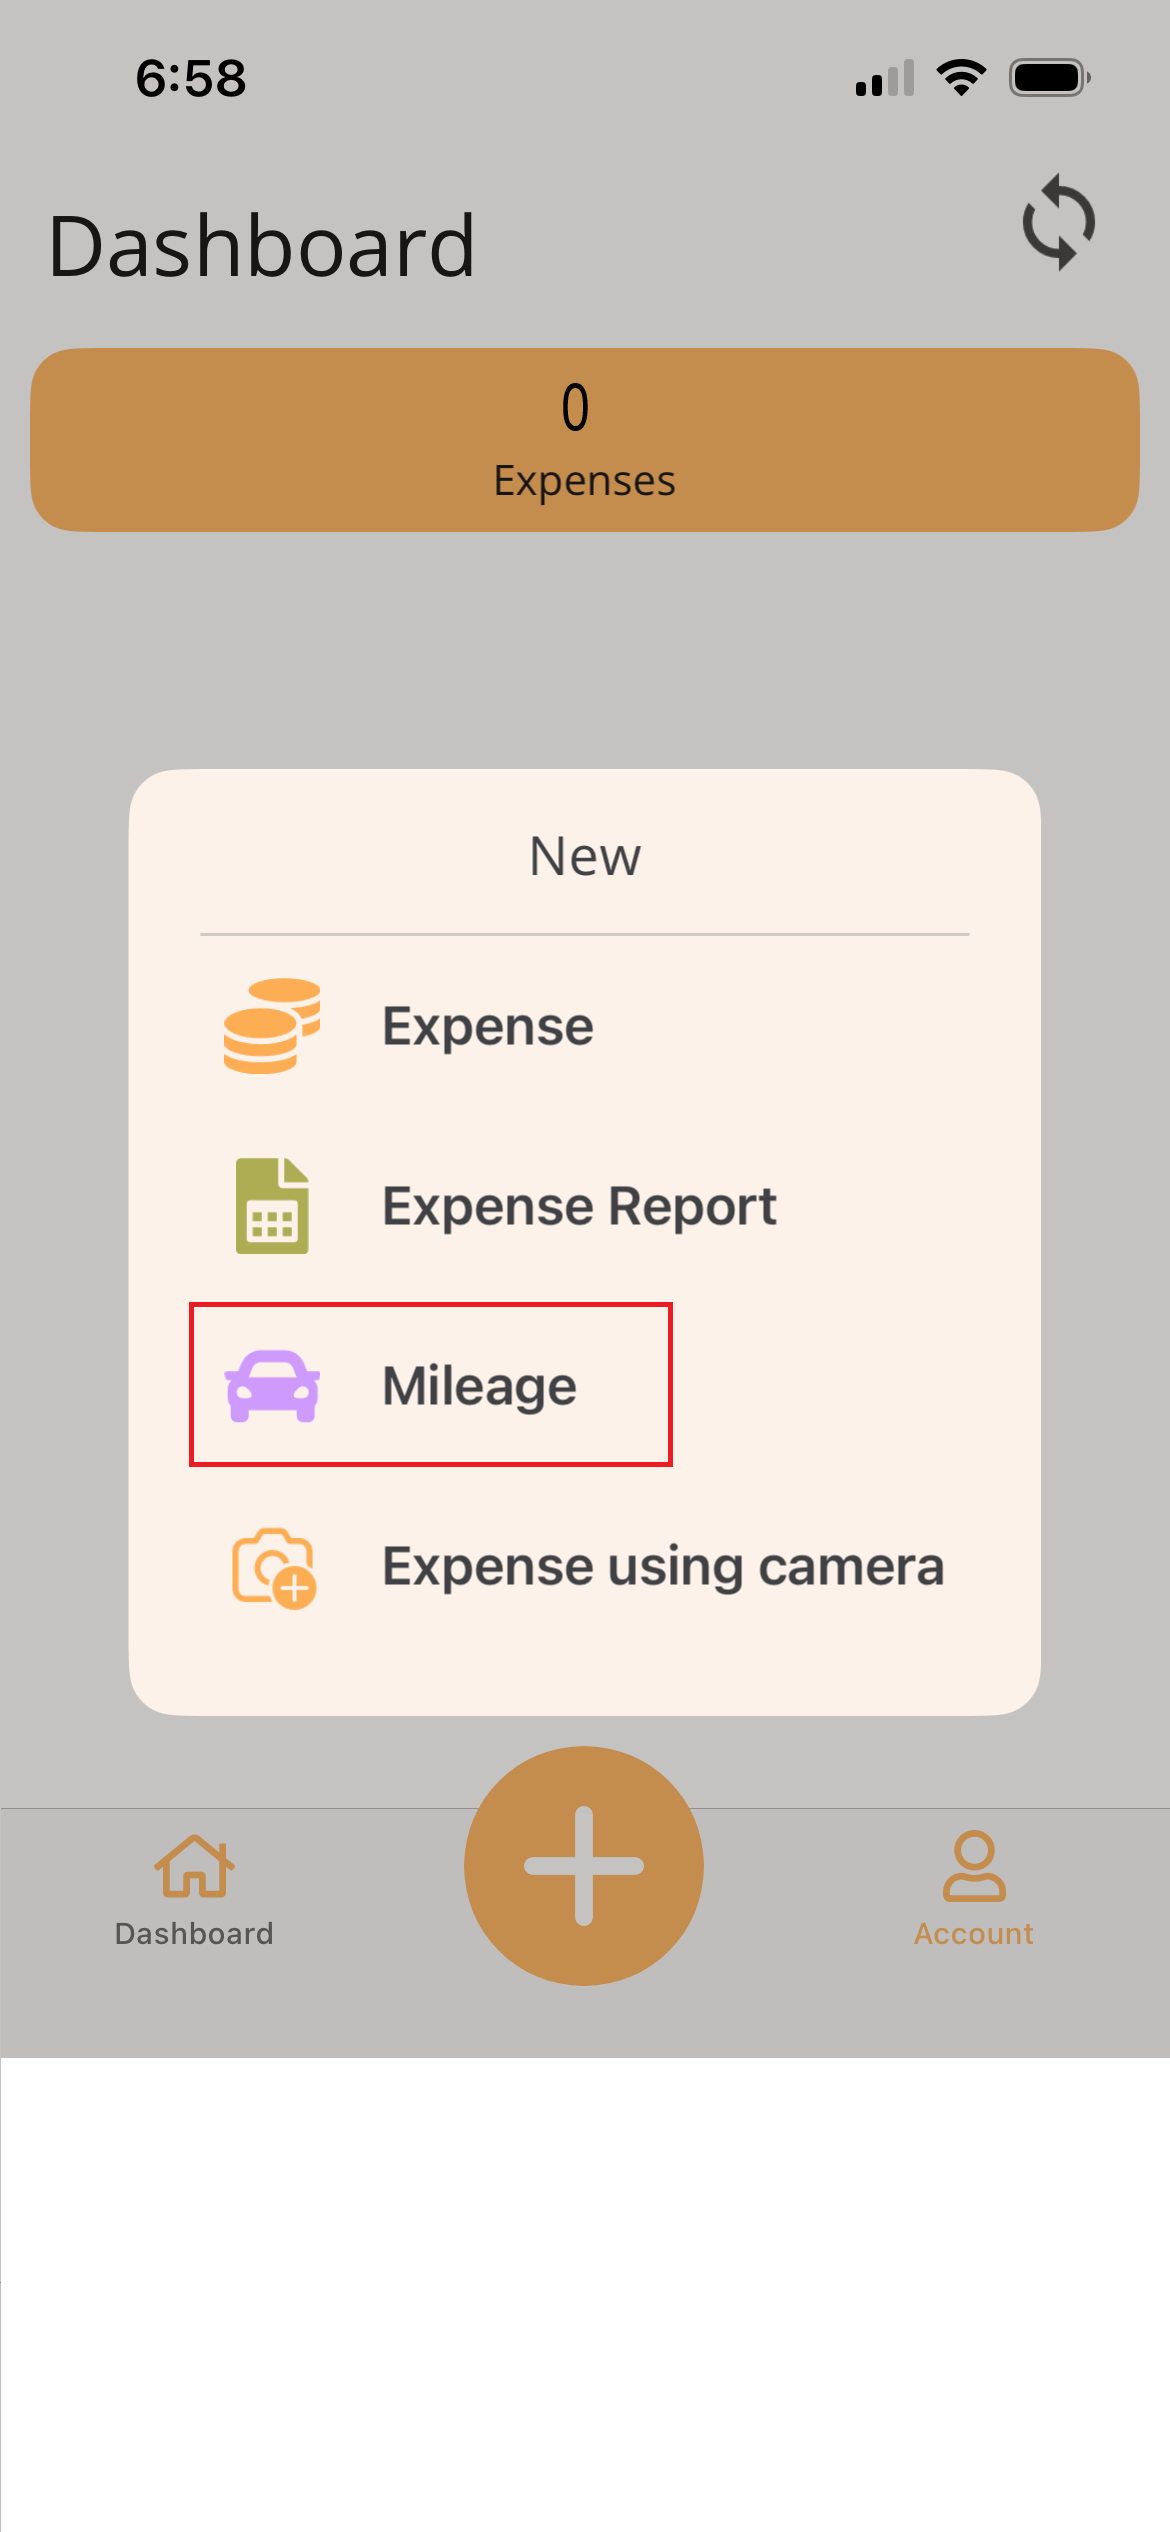
Toque el icono Más (+) en la parte inferior de la aplicación.
-
Seleccione Kilometraje.
-
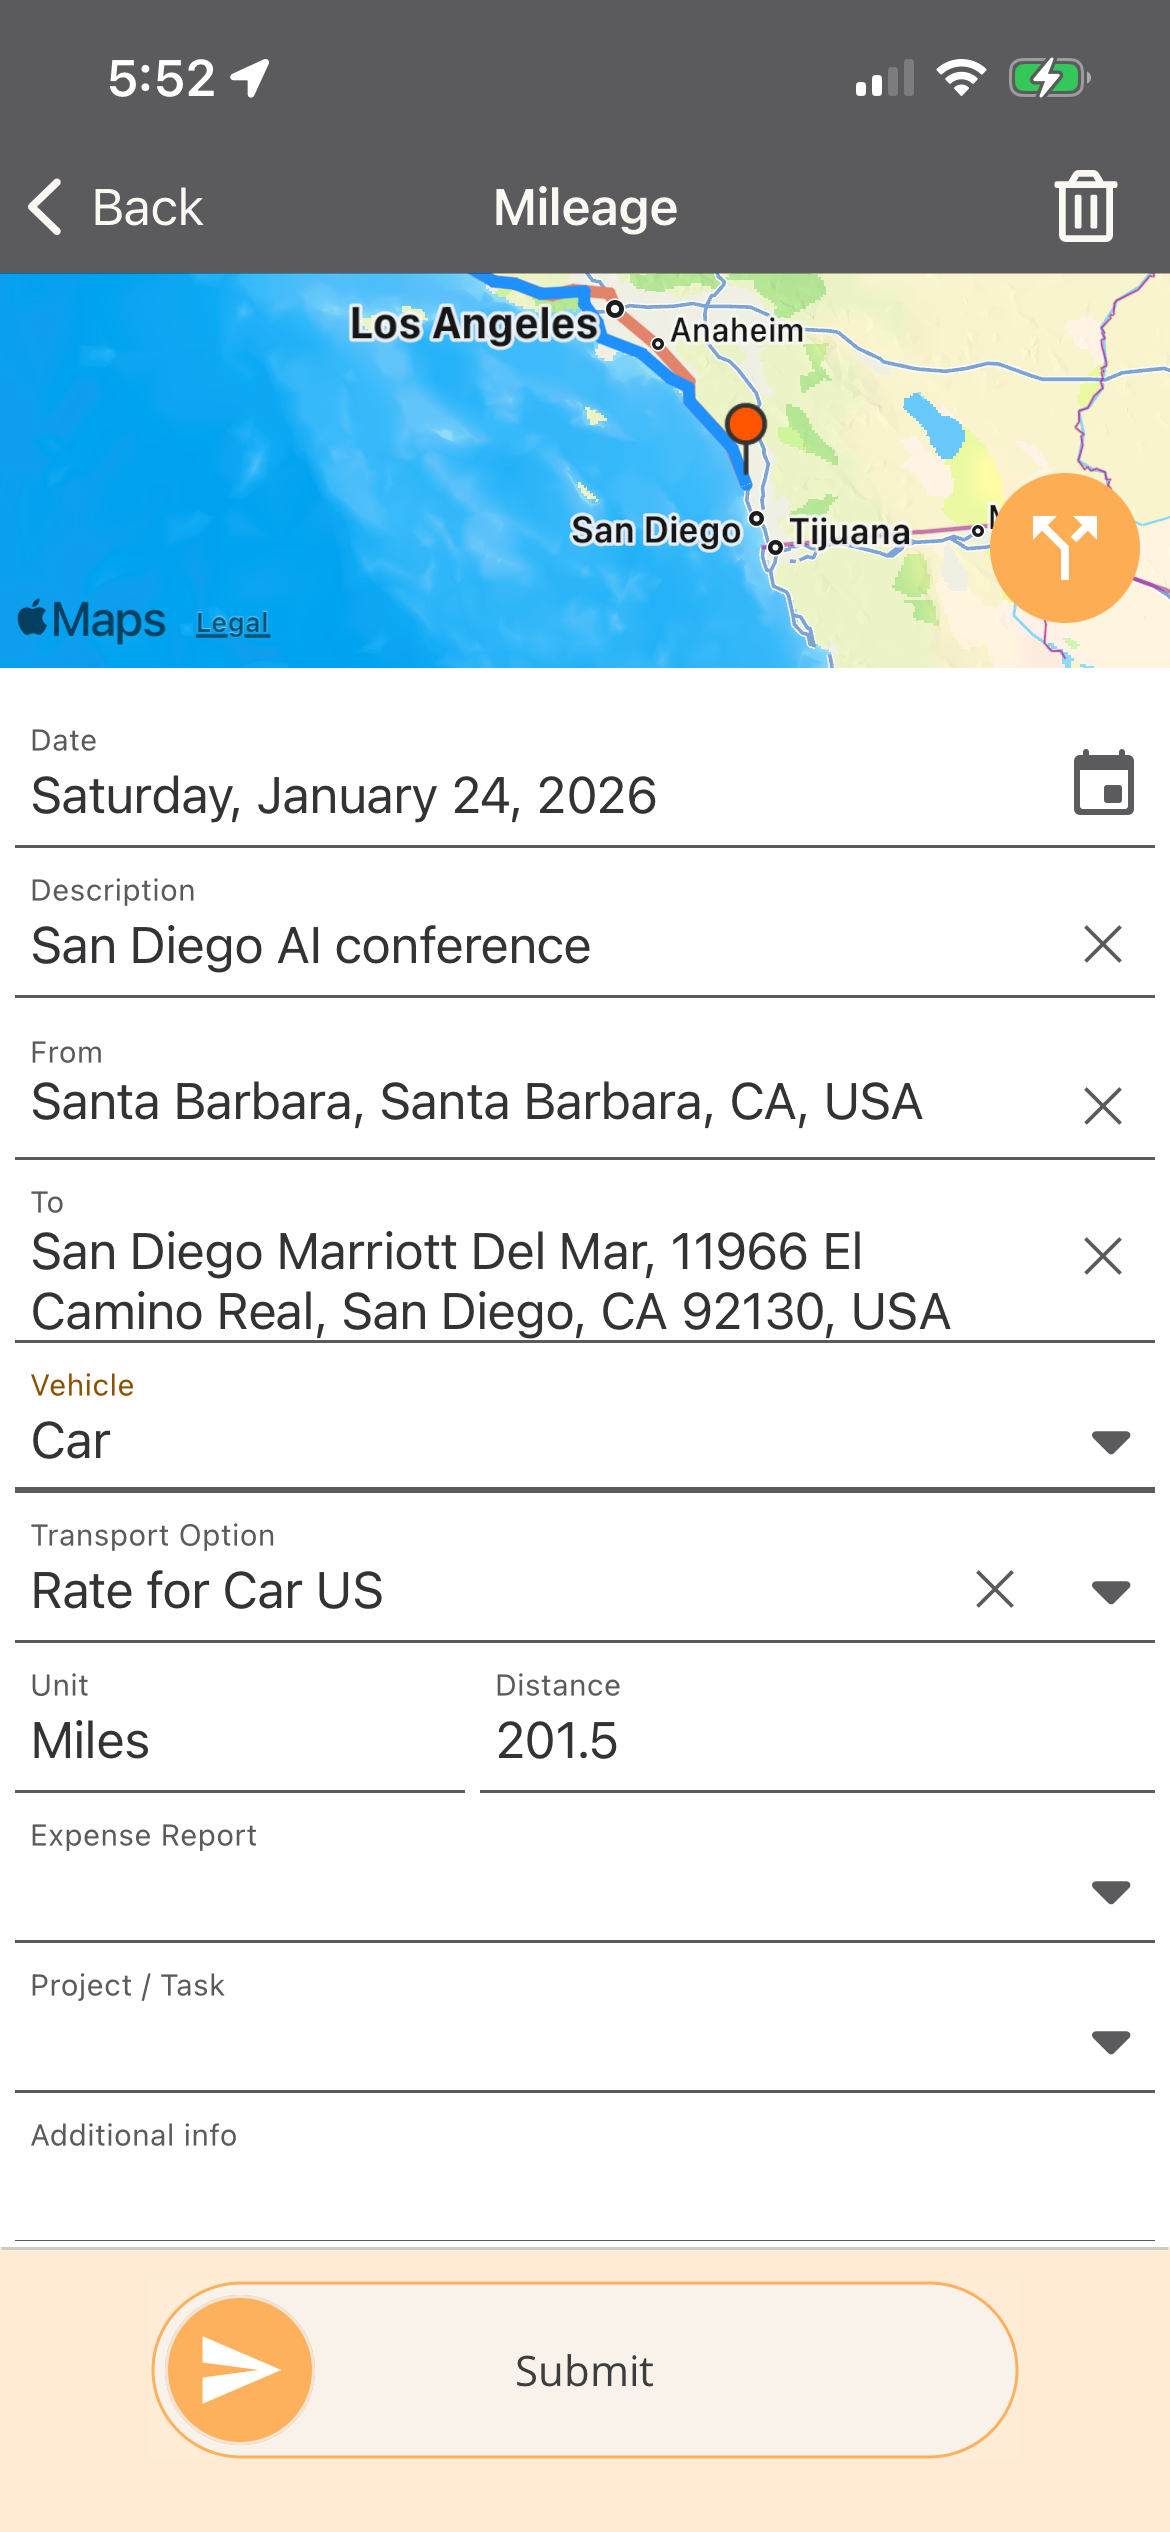
Ingrese los detalles del kilometraje - Complete los campos a continuación para presentar su kilometraje para aprobación. Los campos marcados con una línea roja son obligatorios.
- Date: Modifique la fecha de la entrada de kilometraje. Al usar la aplicación, la fecha de hoy se aplica por defecto.
- Description: Ingrese una breve descripción del viaje.
- Route Ingrese la ruta usando el Map o ingresando los campos From y To.
- Opción Map - El mapa en la parte superior de la pantalla muestra la ubicación actual del usuario. El usuario puede arrastrar y hacer zoom en el mapa para ajustar la ruta. Una vez que se ingresa una ruta, toque el icono Alternative Route para cambiar entre las opciones de ruta disponibles.
- Campos From y To -
- From: Toque en el campo From e ingrese la dirección de inicio o el nombre de la ubicación en el campo de búsqueda. Seleccione la ubicación correcta como punto de partida.
- To: Toque en el campo To e ingrese la dirección de destino o el nombre de la ubicación en el campo de búsqueda. Seleccione la ubicación correcta para su destino.
- Vehicle: Seleccione el vehículo que fue utilizado.
- Unit: Se asignará por defecto la unidad del vehículo.
- Distnace: La distancia se calcula automáticamente basándose en la ruta. Puede ajustar manualmente la distancia si es necesario.
- Expense Report: Opcionalmente seleccione un informe de gastos existente para agrupar este gasto. Si crea el gasto dentro del informe de gastos, el valor se completará automáticamente.
- Project / Task: Busque y seleccione el proyecto, luego la tarea. Una vez seleccionados, se muestran las descripciones del proyecto y la tarea.
- Additional Info: Ingrese cualquier detalle adicional relacionado con el viaje.
-
Slide to Submit: Cuando todos los campos obligatorios estén completados, use Slide to Submit para enviar el kilometraje para aprobación.
-
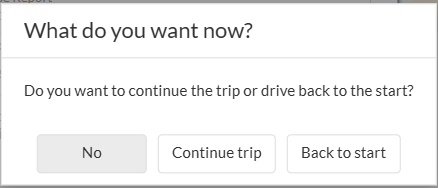
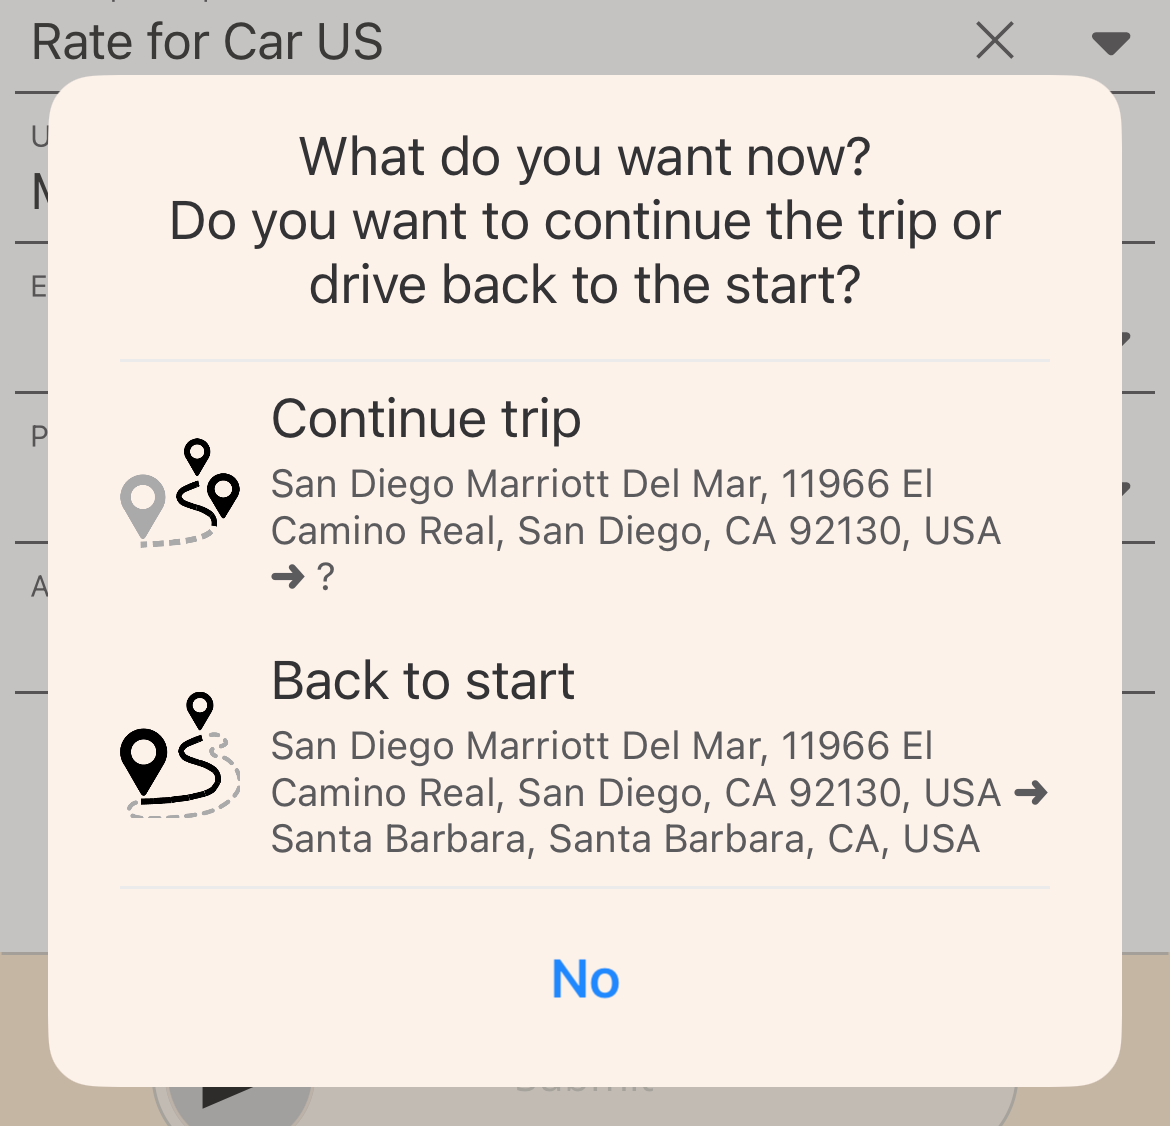
Return Trip: Después de presentar el gasto de kilometraje, se le pedirá al usuario que indique si el viaje continuará o regresará a la ubicación de inicio. Seleccione una de las siguientes opciones:
- Continue Trip: Seleccione si el viaje incluye paradas adicionales. Se crea una nueva entrada de kilometraje, con el campo From completado automáticamente usando la dirección de Destination del viaje anterior.
- Back to Start: Seleccione si realiza un viaje de regreso usando la misma ruta. Se crea una nueva entrada de kilometraje para la ruta de regreso.
- No: Finaliza el viaje y presenta la entrada de kilometraje.
Crear y presentar un gasto de kilometraje a través del portal web
Las dietas son asignaciones diarias proporcionadas a los empleados para cubrir los gastos del día a día incurridos durante los viajes de negocios.
-
Abra el portal web de Travel & Expense
-
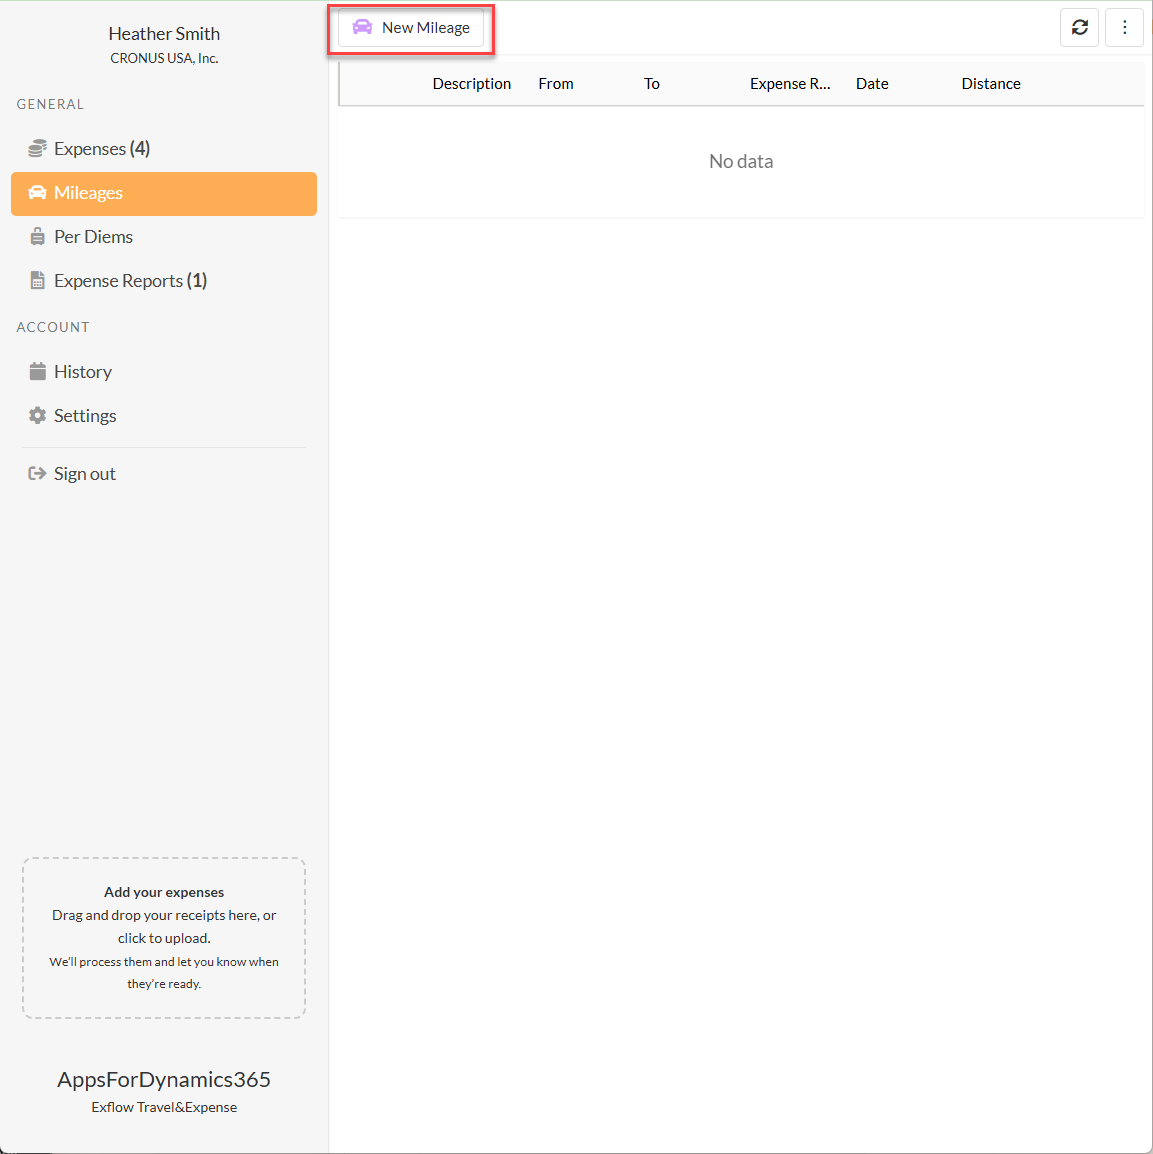
Desde el menú General en el lado izquierdo, seleccione Mileage.
-
Seleccione New Mileage en la parte superior de la página para crear un nuevo gasto.
-
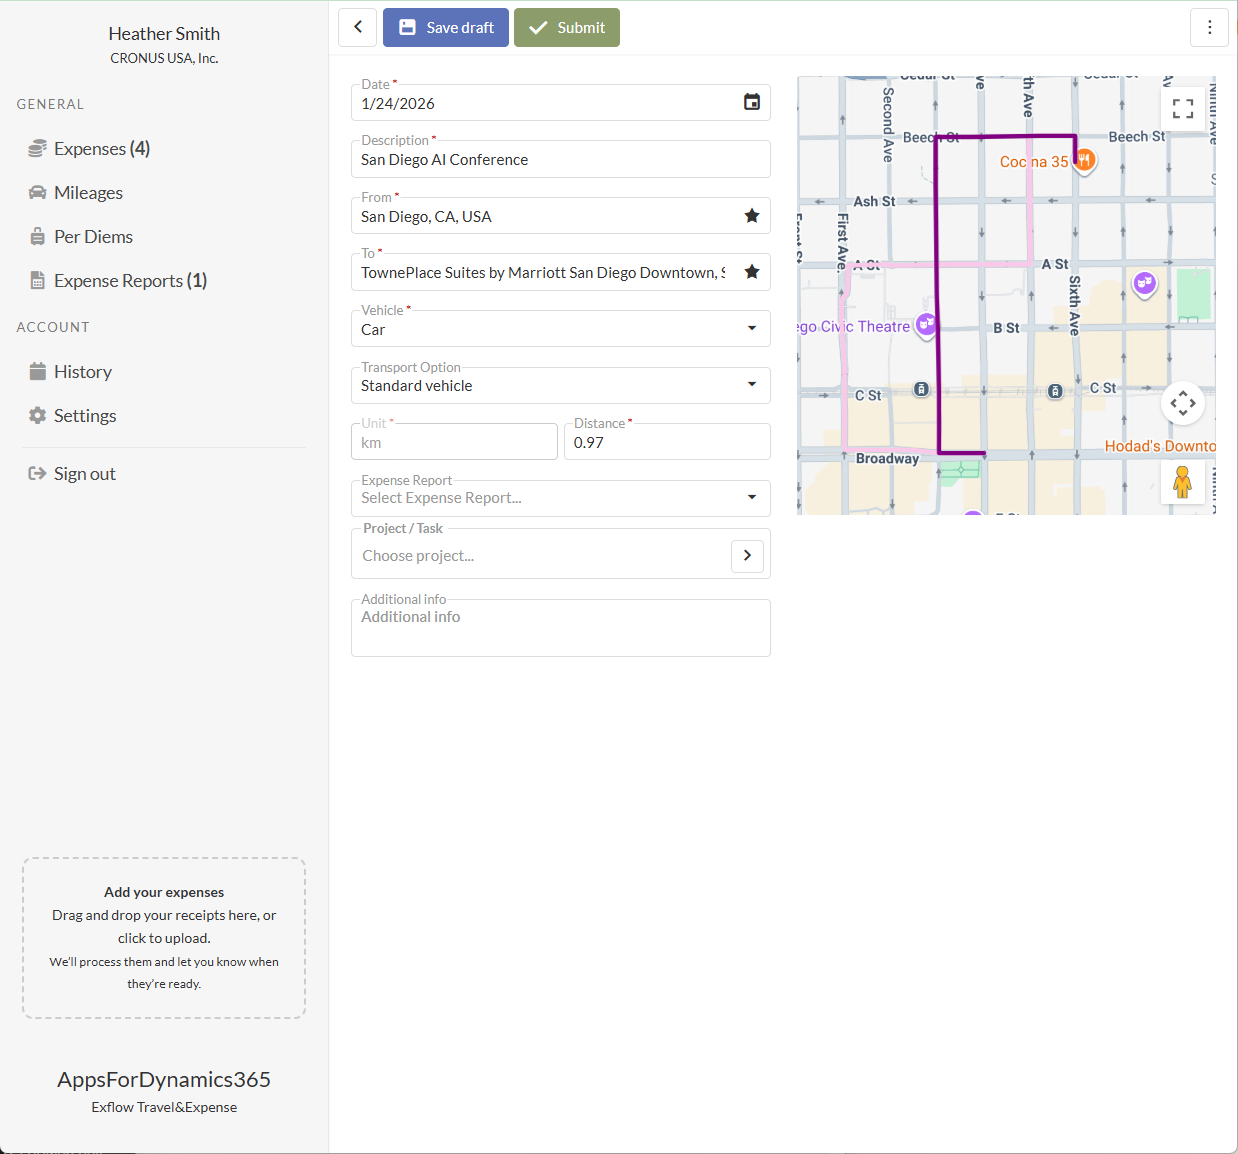
Ingrese los detalles del gasto en los siguientes campos: Ingrese los detalles del kilometraje - Complete los campos a continuación para presentar su kilometraje para aprobación. Los campos marcados con una línea roja son obligatorios.
- Date: Modifique la fecha de la entrada de kilometraje. Al usar la aplicación, la fecha de hoy se aplica por defecto.
- Description: Ingrese una breve descripción del viaje.
- From: Comience a escribir la dirección de inicio o el nombre de la ubicación y seleccione el valor apropiado de la lista. También puede seleccionar el icono Star para elegir de sus ubicaciones Favoritas.
- To: Comience a escribir la dirección de destino o el nombre de la ubicación y seleccione el valor apropiado de la lista. También puede seleccionar el icono Star para elegir de sus ubicaciones Favoritas.
- Vehicle: Seleccione el vehículo que fue utilizado.
- Unit: Se asignará por defecto la unidad del vehículo.
- Distnace: La distancia se calcula automáticamente basándose en la ruta. Puede ajustar manualmente la distancia si es necesario.
- Expense Report: Opcionalmente seleccione un informe de gastos existente para agrupar este gasto. Si crea el gasto dentro del informe de gastos, el valor se completará automáticamente.
- Project / Task: Busque y seleccione el proyecto, luego la tarea. Una vez seleccionados, se muestran las descripciones del proyecto y la tarea.
- Additional Info: Ingrese cualquier detalle adicional relacionado con el viaje.
-
Elija Save as Draft para finalizar más tarde o Submit para enviar el gasto de kilometraje para procesamiento.
-
Return Trip: Después de presentar el gasto de kilometraje, se le pedirá al usuario que indique si el viaje continuará o regresará a la ubicación de inicio. Seleccione una de las siguientes opciones:
- Continue Trip: Seleccione si el viaje incluye paradas adicionales. Se crea una nueva entrada de kilometraje, con el campo From completado automáticamente usando la dirección de Destination del viaje anterior.
- Back to Start: Seleccione si realiza un viaje de regreso usando la misma ruta. Se crea una nueva entrada de kilometraje para la ruta de regreso.
- No: Finaliza el viaje y presenta la entrada de kilometraje.