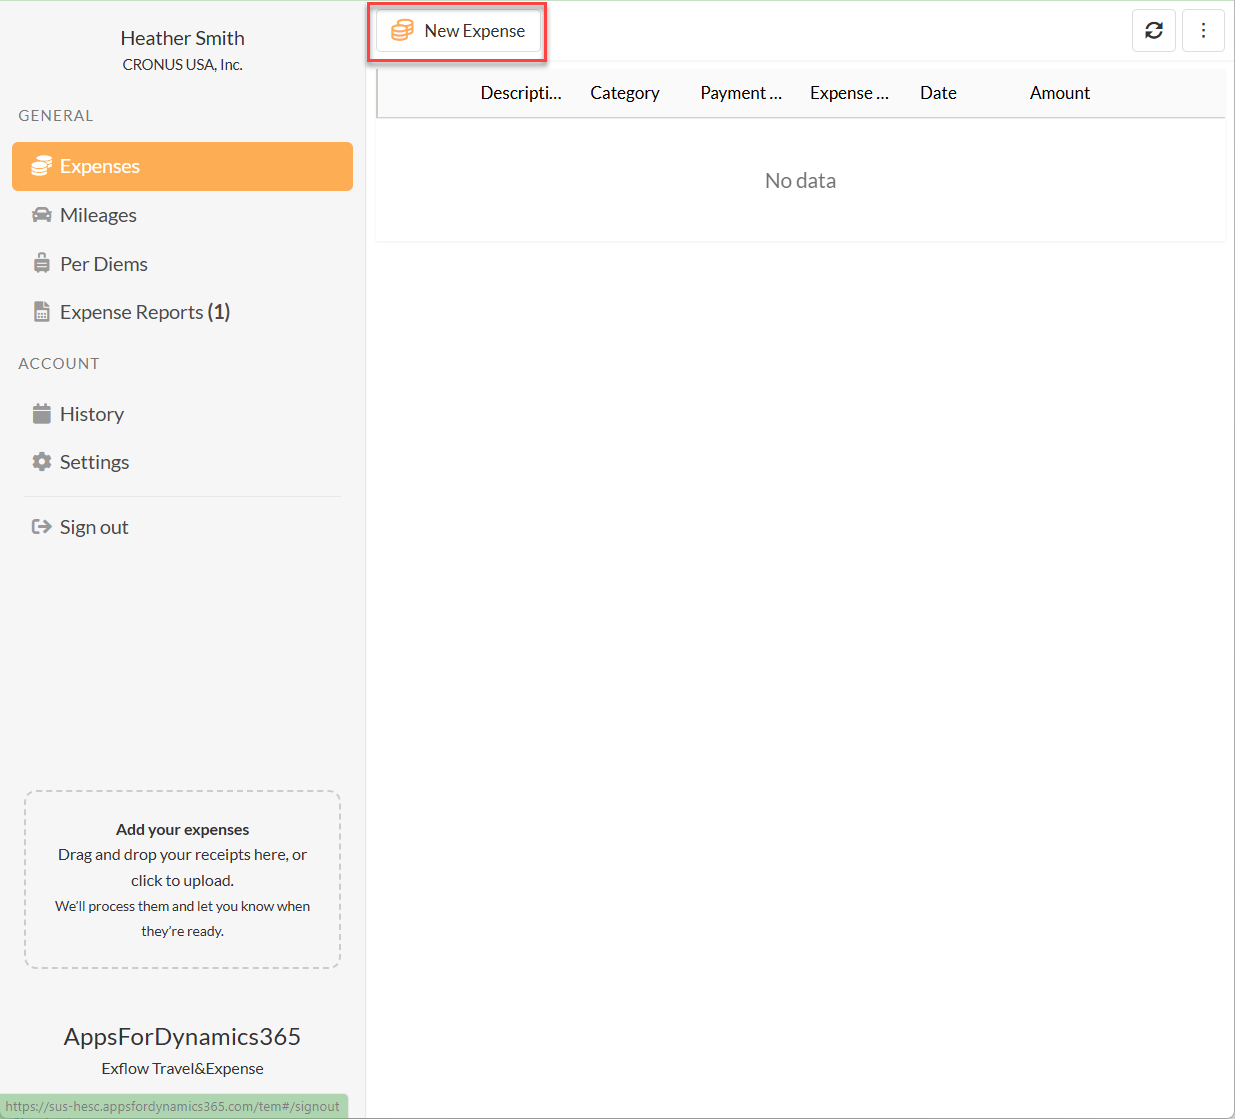
Crear y Enviar Informes de Gastos a través de la Aplicación Móvil
Los Informes de Gastos le permiten agrupar gastos, kilometraje y dietas en un solo informe, proporcionando un resumen claro del gasto total.
Para habilitar los Informes de Gastos, vaya a la página Basic Setup y asigne una Serie Numérica para los Informes de Gastos.

Introducir un Informe de Gastos
-
Inicie sesión en la Aplicación Móvil de ExFlow Travel & Expense
-
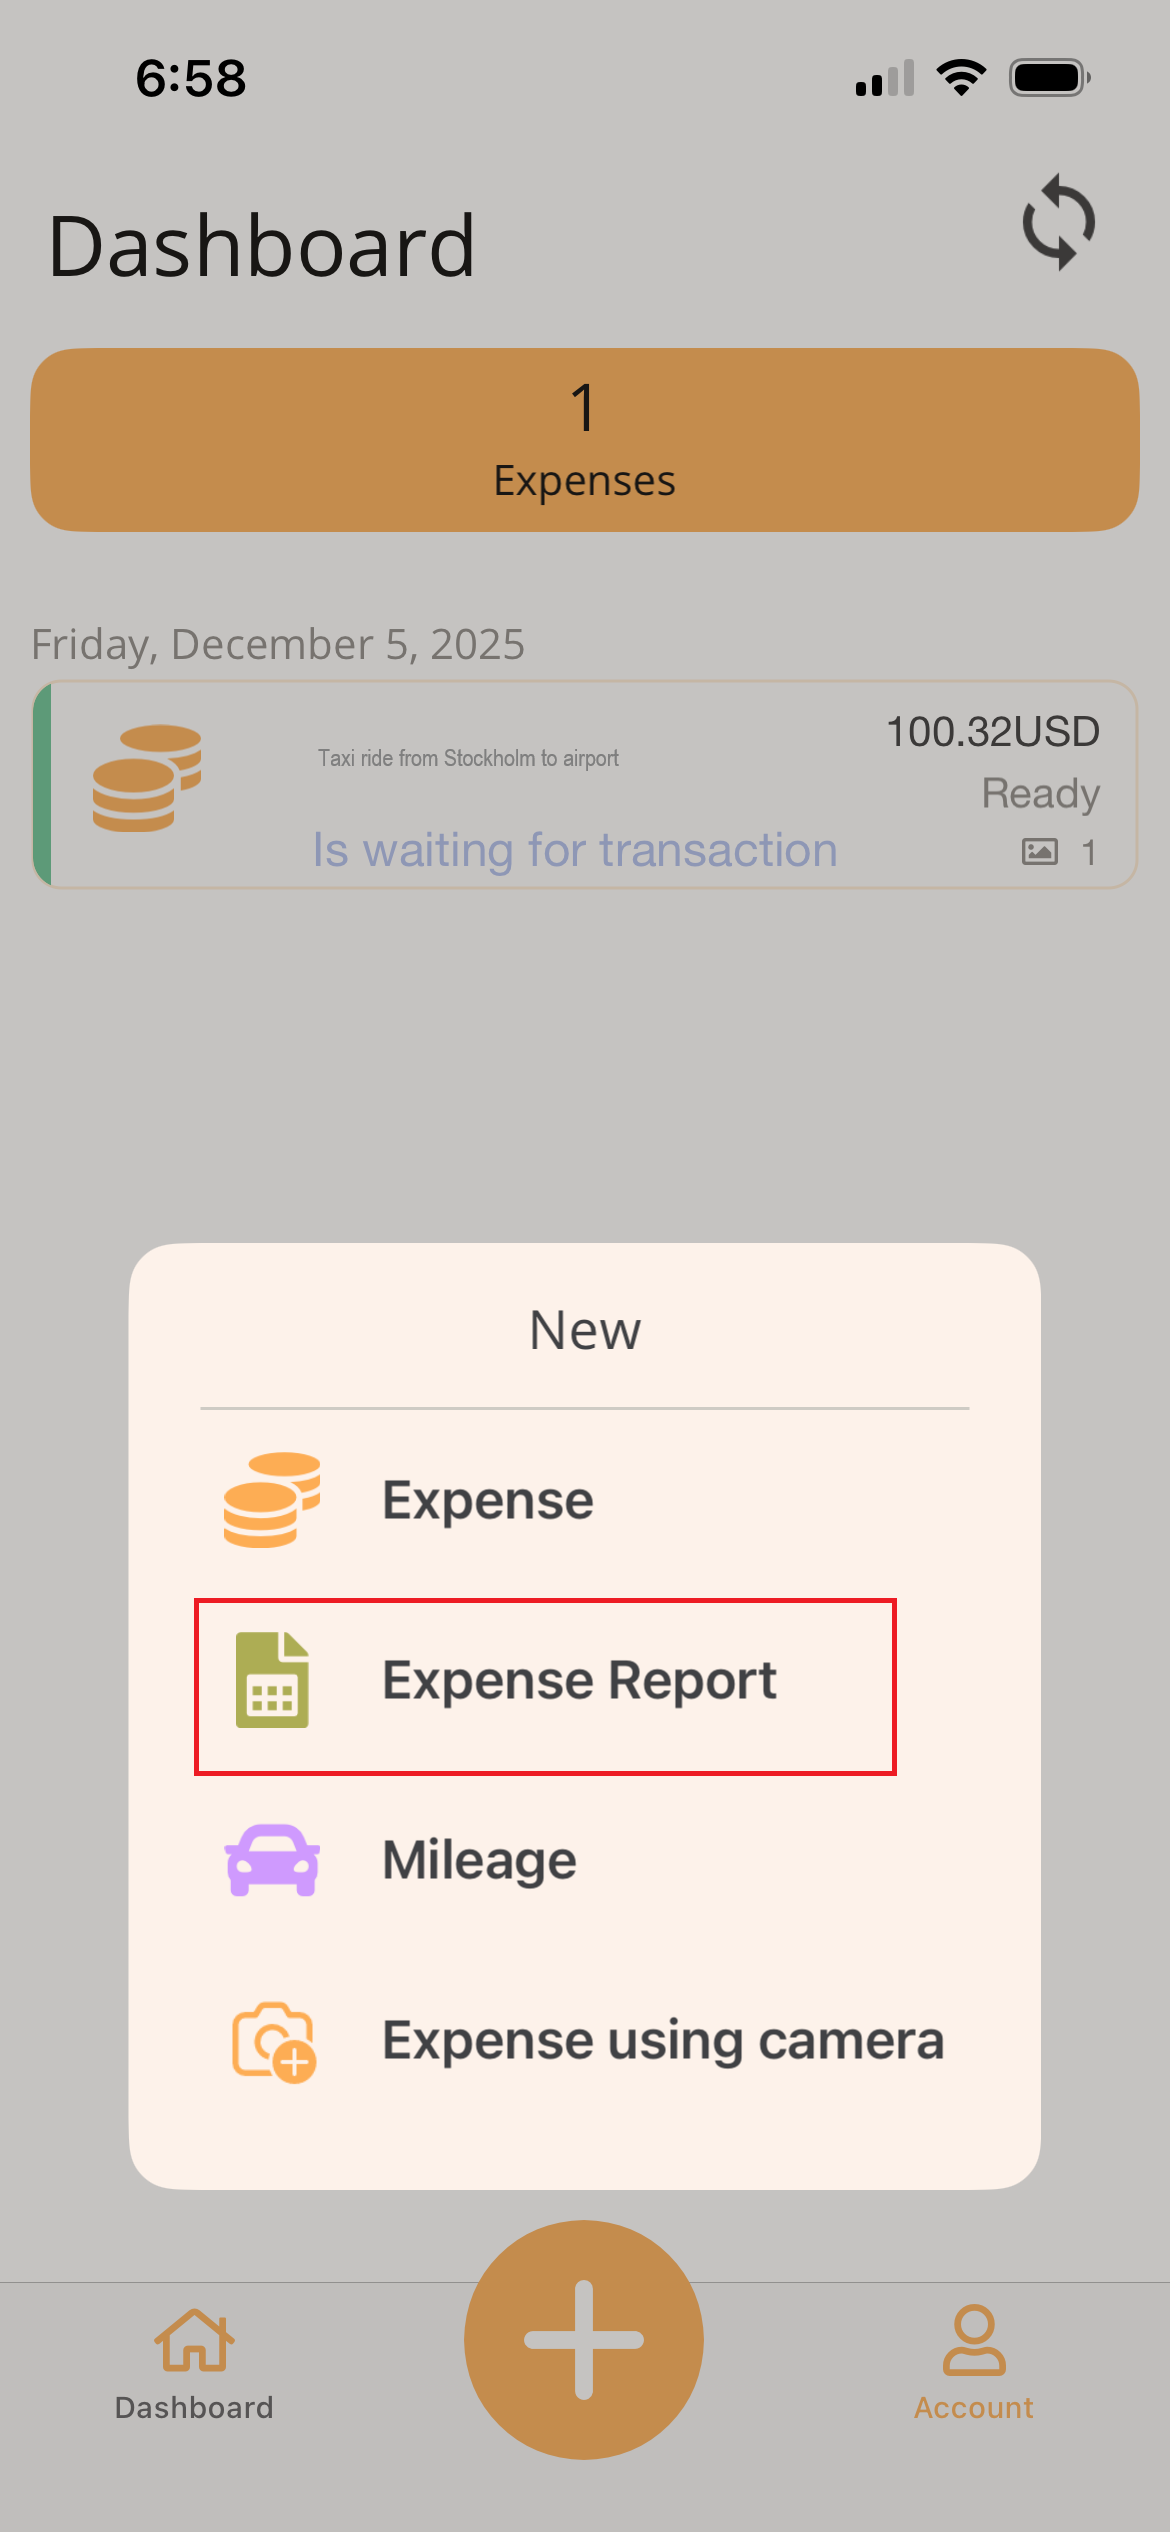
En la aplicación móvil, haga clic en el icono + en la parte inferior de la página y seleccione Expense Report.
-
Introduzca valores en los siguientes campos:
-
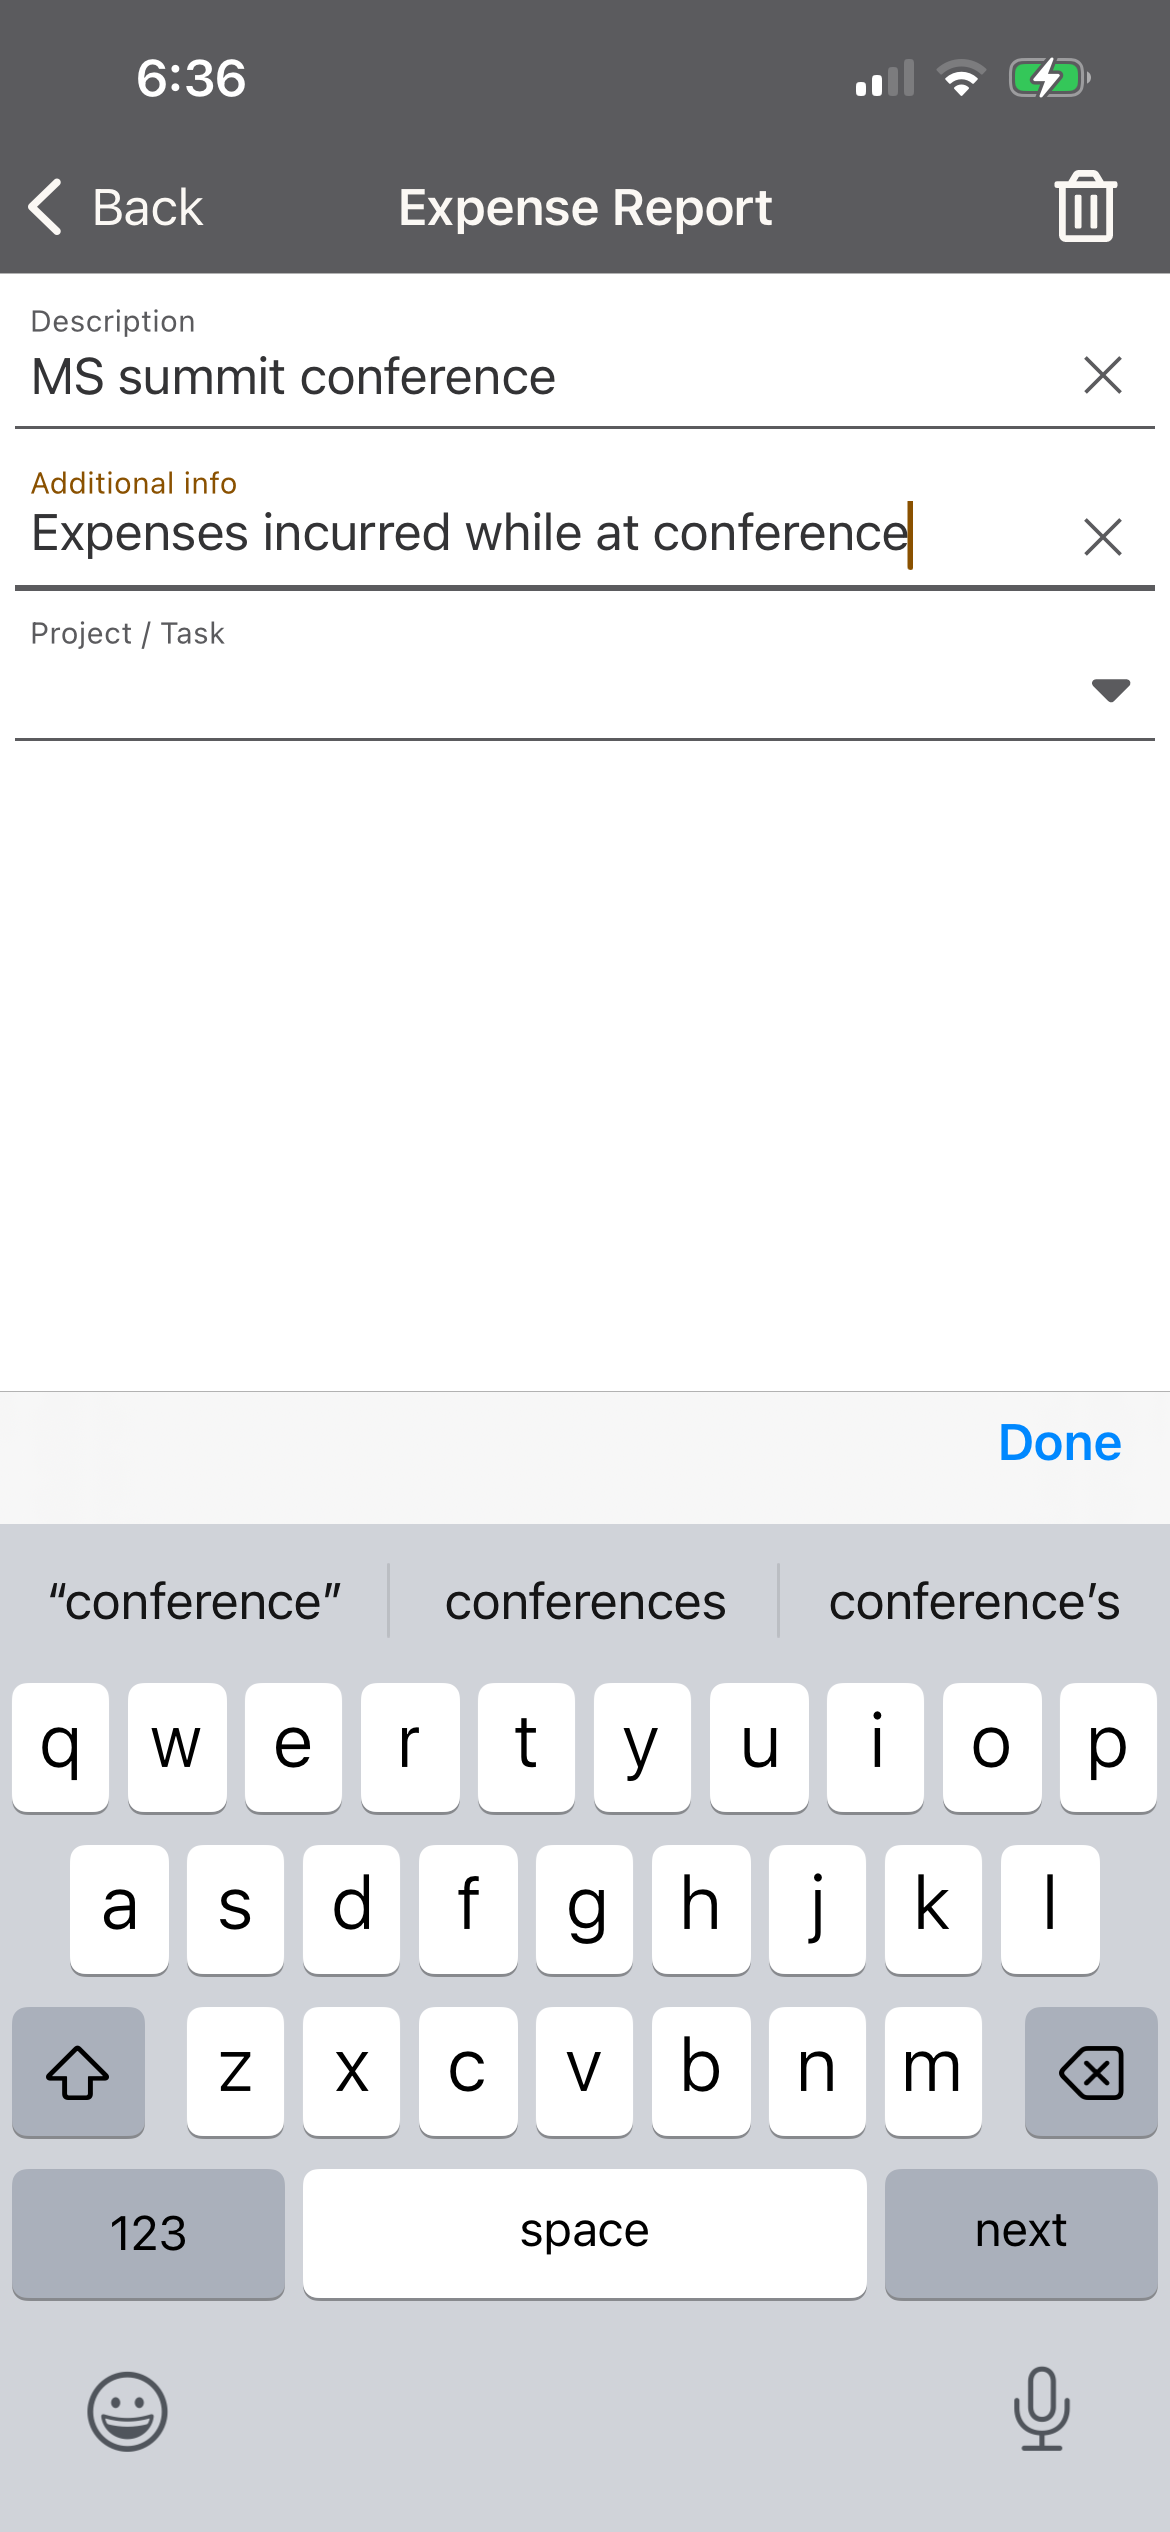
Description: Introduzca la descripción general del tipo de gastos que contendrá este informe de gastos. Por ejemplo, ''MS Summit Conference'', ''Gastos de Marzo 2026'', etc.
-
Additional Info: (Opcional) Introduzca cualquier otro detalle que desee proporcionar sobre el informe de gastos para ayudar en la aprobación.
-
Project/Task: (Opcional) Introduzca el Proyecto/Tarea que desea asociar con este informe de gastos. Si se introduce, el Proyecto/Tarea ingresado aquí se establecerá por defecto en los gastos añadidos a este informe de gastos.
-
-
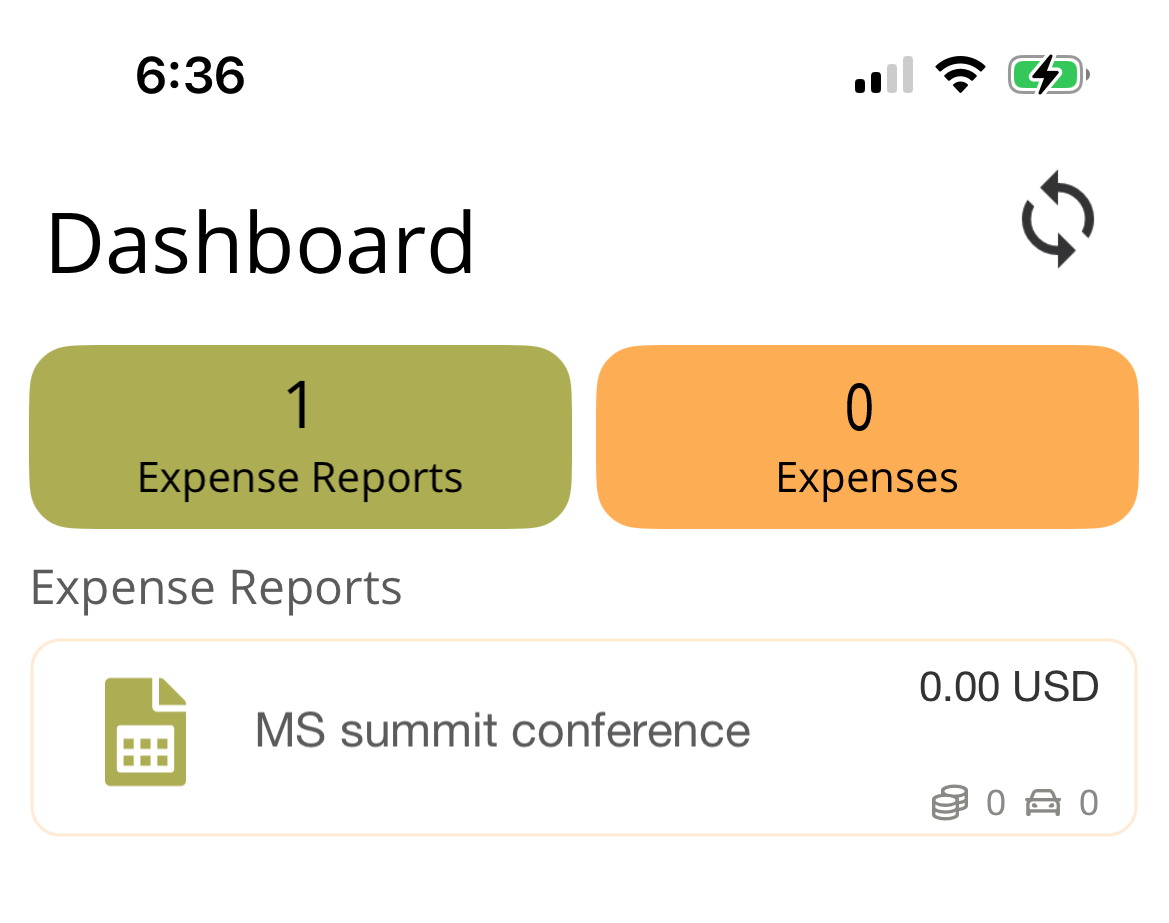
Haga clic en Done y será redirigido a su panel de control donde verá su informe de gastos.
-
Para añadir gastos al Informe de Gastos:
- Seleccione el informe de gastos desde su panel de control.
- Haga clic en + y elija Add Expense, Add Mileage o Add Per Diem de las opciones mostradas.
Crear y Enviar un Gasto Individual a través de la Aplicación Móvil
Al introducir un gasto, es importante adjuntar una foto clara o un escaneo del recibo. Travel & Expense utiliza tecnología OCR y SmartExtract (AI) para leer el recibo y extraer automáticamente detalles como fecha, importe, moneda, ubicación y descripción, reduciendo la cantidad de entrada manual de datos requerida.
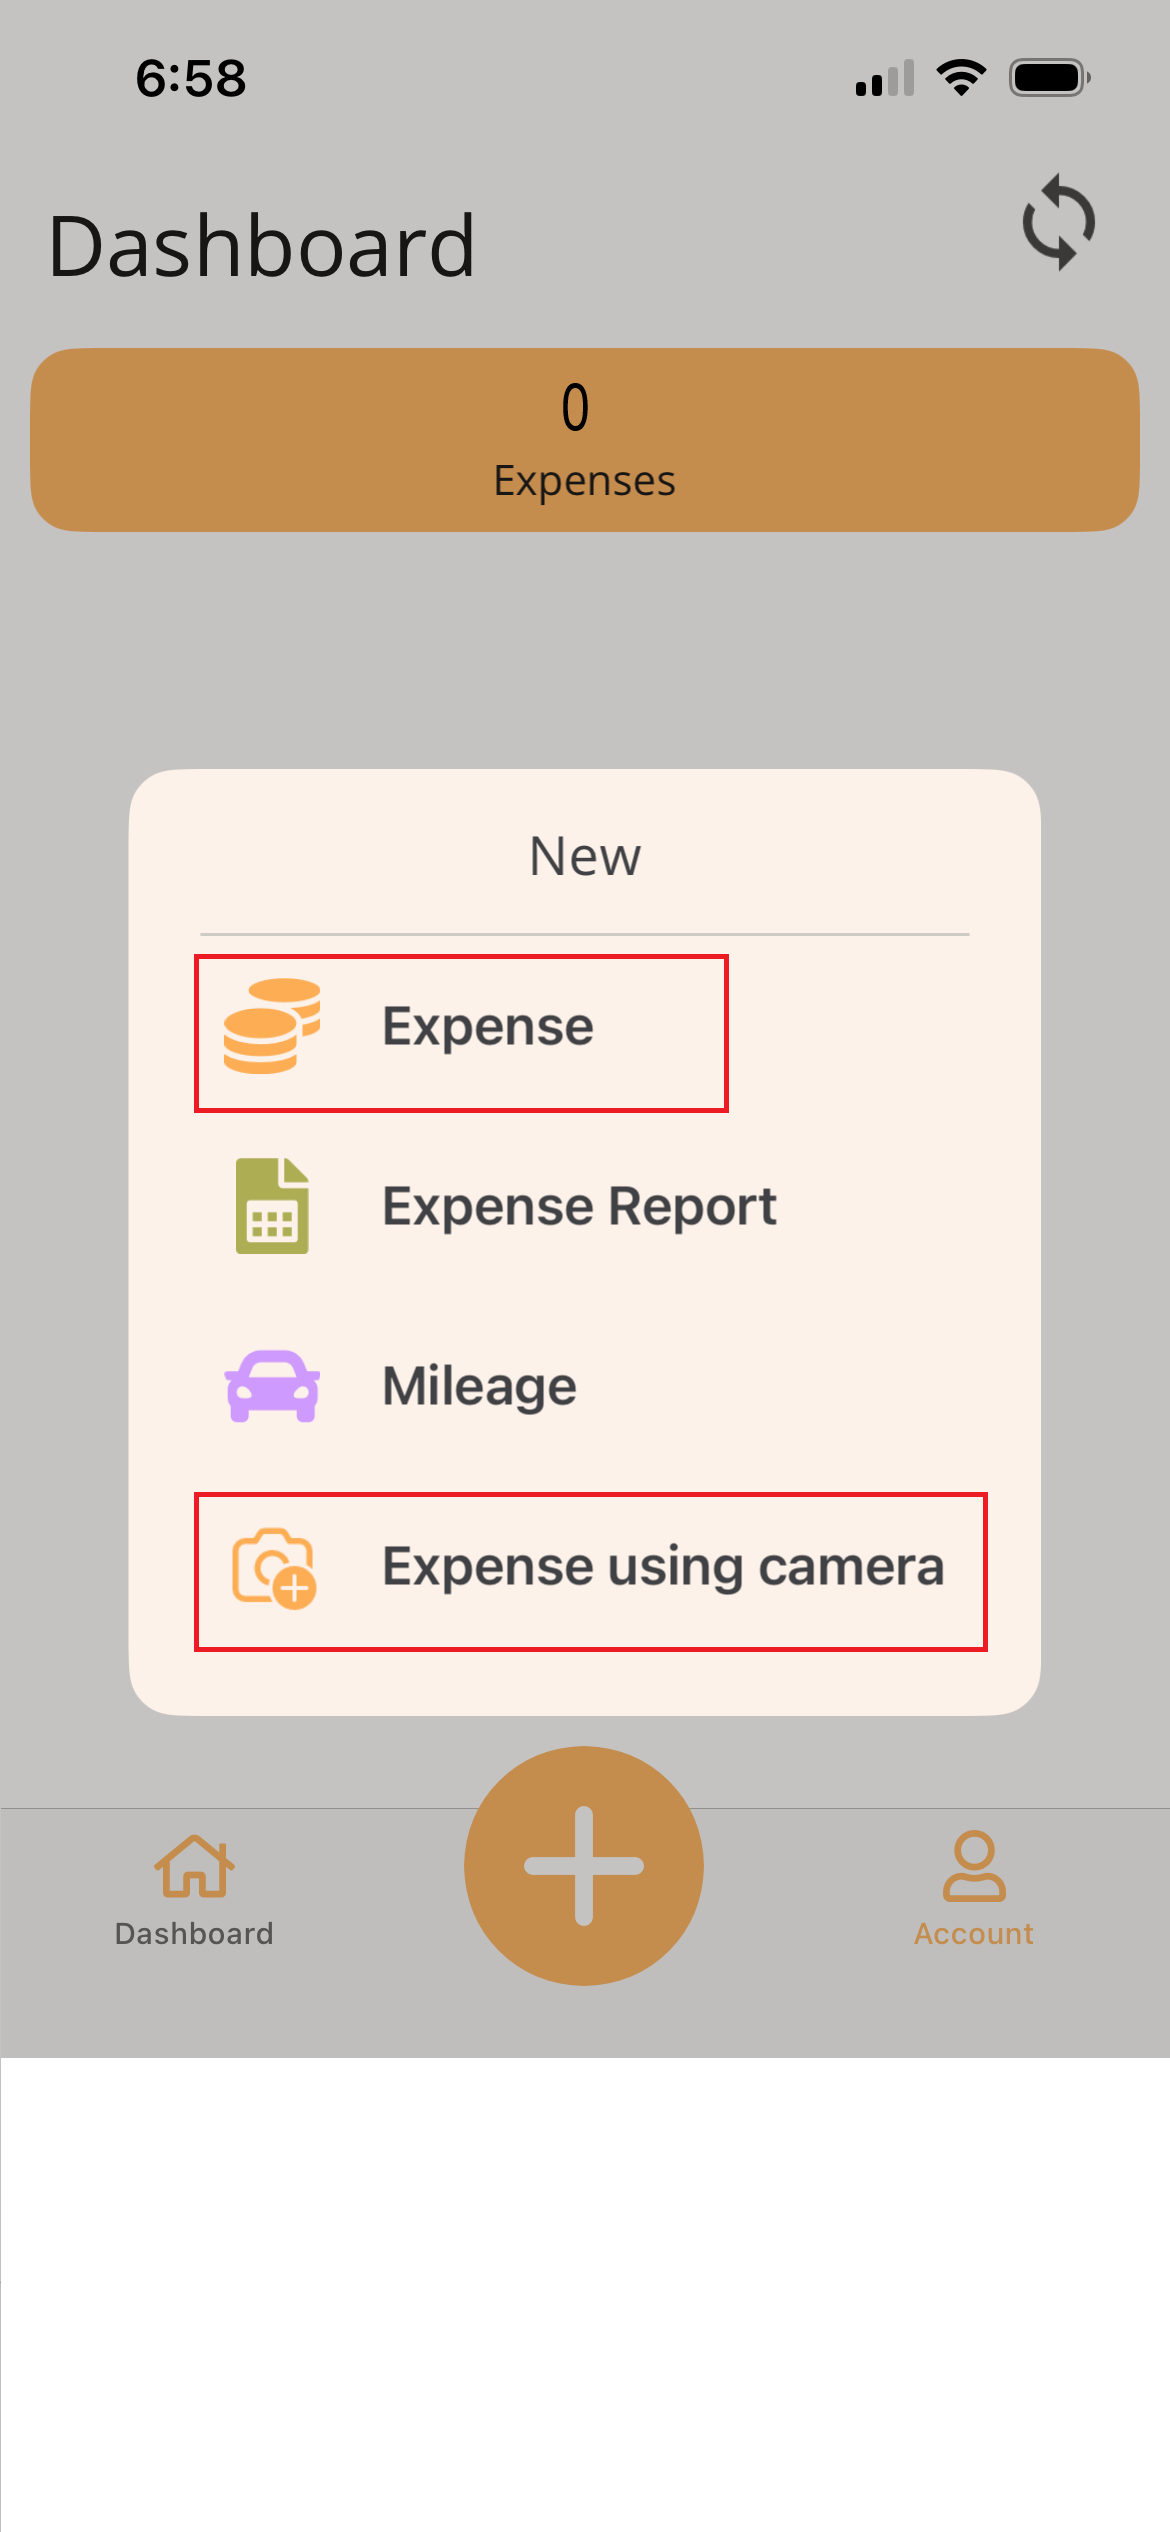
En la aplicación móvil de Travel & Expense, hay dos formas de crear un gasto:
-
Expense: Cree un gasto seleccionando una imagen de recibo existente de su galería de fotos o escaneando un recibo.
-
Expense Using Camera (Recomendado) Capture y registre rápidamente un gasto en el momento en que ocurre tomando una foto del recibo con la cámara de su dispositivo.
-
Abra la aplicación móvil de Travel & Expense
-
Desde su Panel de Control, haga clic en el icono + para introducir un nuevo gasto.
-
Seleccione una de las siguientes opciones:
- Expense
- Se abre la pantalla de entrada de gastos.
- Toque el icono + en la parte superior de la pantalla y elija:
- Scan Receipt – Use su cámara para tomar una foto del recibo.
- Select Photo – Elija una imagen de recibo existente de su biblioteca de fotos.
- Expense Using Camera
- La cámara de su dispositivo se abre automáticamente.
- Tome una foto del recibo.
- Toque Keep, luego Save.
- Expense
-
Se crea un gasto y los detalles se extraen automáticamente del recibo (si se adjuntó).
-
Revise y actualice los detalles del gasto para asegurar la precisión.
-
Date: La fecha en que se incurrió el gasto. Este campo se completa automáticamente cuando se adjunta un recibo y se extraen los datos del recibo.
-
Currency: La moneda del importe del recibo. Este campo se completa automáticamente cuando se adjunta un recibo y se extraen los datos del recibo.
-
Amount: El importe a reembolsar o registrar. Este campo se completa automáticamente cuando se adjunta un recibo y se extraen los datos del recibo.
-
Country: El país donde se incurrió el gasto. Este campo se completa automáticamente cuando se adjunta un recibo y se extraen los datos del recibo.
-
Description: Descripción del gasto. Este campo se completa automáticamente cuando se adjunta un recibo y se extraen los datos del recibo.
-
Payment Method:
- Employee – Seleccione cuando el gasto debe ser reembolsado al empleado.
- Company Card* – Seleccione la tarjeta corporativa correspondiente si el gasto fue cargado directamente y no requiere reembolso.
-
Category: Seleccione la categoría que mejor describe el gasto. Este campo se completa automáticamente cuando se adjunta un recibo y se extraen los datos del recibo.
- Additional Dimension Field - Si la categoría de gasto seleccionada está configurada para usar una dimensión adicional, este campo aparecerá y le permitirá seleccionar un valor.
-
Expense Report: Opcionalmente seleccione un informe de gastos existente para agrupar este gasto. Si crea el gasto dentro del informe de gastos, el valor se completará automáticamente.
-
Project/Task:
- Busque y seleccione el proyecto.
- Busque y seleccione la tarea.
- Una vez seleccionados ambos valores, se muestran las descripciones del proyecto y la tarea.
-
Participating Employees: El empleado que introduce el gasto se añade por defecto. Añada cualquier empleado adicional incluido en el gasto.
-
Guest (Not Employees): Añada fuentes externas, como clientes, para quienes fue este gasto.
-
Additional Info: Introduzca cualquier detalle adicional que pueda ayudar al aprobador a comprender el gasto.
-
-
Guardar o Enviar el Gasto - elija una de las siguientes opciones:
-
Save as Draft - Toque Back en la parte superior del formulario para guardar el gasto como borrador. Los gastos en borrador no se envían y pueden editarse más tarde.
-
Submit Expense – Deslice su dedo a través de la barra Slide to Submit para enviar el gasto para aprobación.

Nota: Cuando envía un gasto usando la aplicación móvil, se carga al servidor instantáneamente (cuando está en línea), eliminando la necesidad de sincronización manual por parte del usuario.
-
Crear y Enviar Informes de Gastos a través del Portal Web
Los Informes de Gastos le permiten agrupar gastos, kilometraje y dietas en un solo informe, proporcionando un resumen claro del gasto total.
Para habilitar los Informes de Gastos, vaya a la página Basic Setup y asigne una Serie Numérica para los Informes de Gastos.
Introducir un Informe de Gastos a través del Portal Web
-
Inicie sesión en el Portal Web de ExFlow Travel & Expense
-
Desde el menú General en el lado izquierdo, seleccione Expense Reports.
-
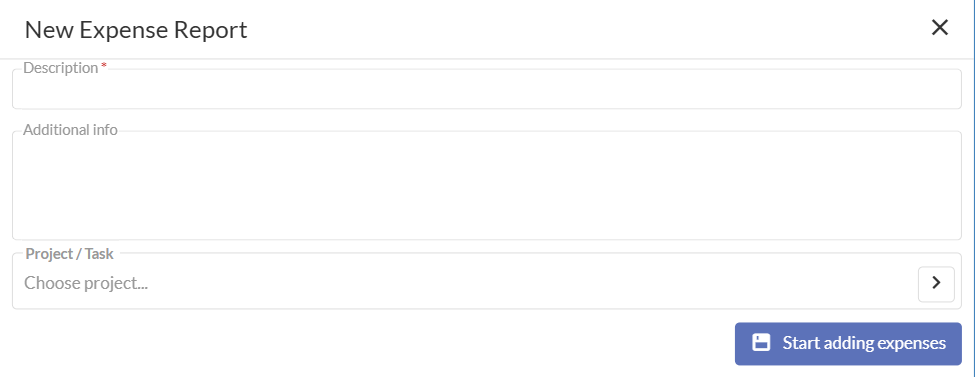
Seleccione New Expense Report en la parte superior de la página para crear un nuevo informe.

-
Introduzca valores en los siguientes campos:
- Description: Introduzca la descripción general del tipo de gastos que contendrá este informe de gastos. Por ejemplo, ''MS Summit Conference'', ''Gastos de Marzo 2026'', etc.
- Additional Info: (Opcional) Introduzca cualquier otro detalle que desee proporcionar sobre el informe de gastos para ayudar en la aprobación.
- Project/Task: (Opcional) Introduzca el Proyecto/Tarea que desea asociar con este informe de gastos. Si se introduce, el Proyecto/Tarea ingresado aquí se establecerá por defecto en los gastos añadidos a este informe de gastos.
-
Haga clic en Start Adding Expenses. Será redirigido al Panel de Control, donde podrá comenzar a añadir gastos al informe de gastos.
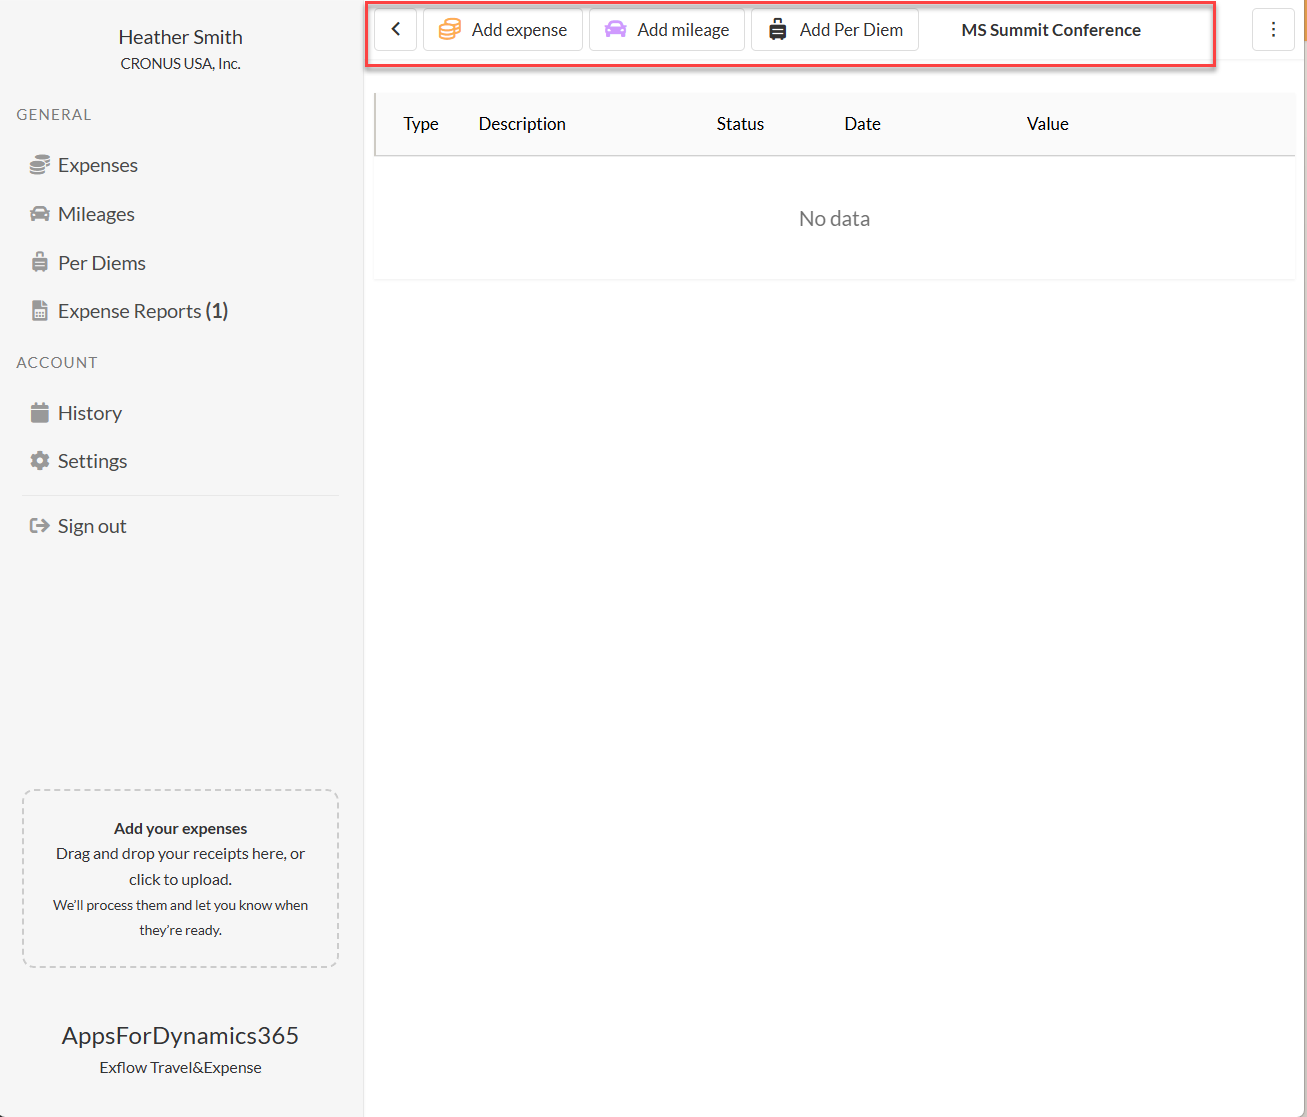
-
Para añadir elementos al Informe de Gastos, elija Add Expense, Add Mileage o Add Per Diem en la parte superior de la página.
Crear y Enviar un Gasto Individual a través del Portal Web
En el Portal Web de Travel & Expense, hay dos formas de crear un gasto:
- Manual - Cree un gasto e introduzca los detalles manualmente.
- SmartExtract – Arrastre y suelte un archivo de recibo, y SmartExtract extraerá automáticamente los detalles del recibo y creará el gasto por usted.
Entrada de Gastos con SmartExtract (Recomendado)
Al introducir un gasto, es importante adjuntar una foto clara del recibo. Travel & Expense utiliza tecnología OCR y SmartExtract (AI) para leer el recibo y extraer automáticamente detalles como fecha, importe y proveedor, reduciendo la cantidad de entrada manual de datos requerida.
-
Abra el Portal Web de Travel & Expense
-
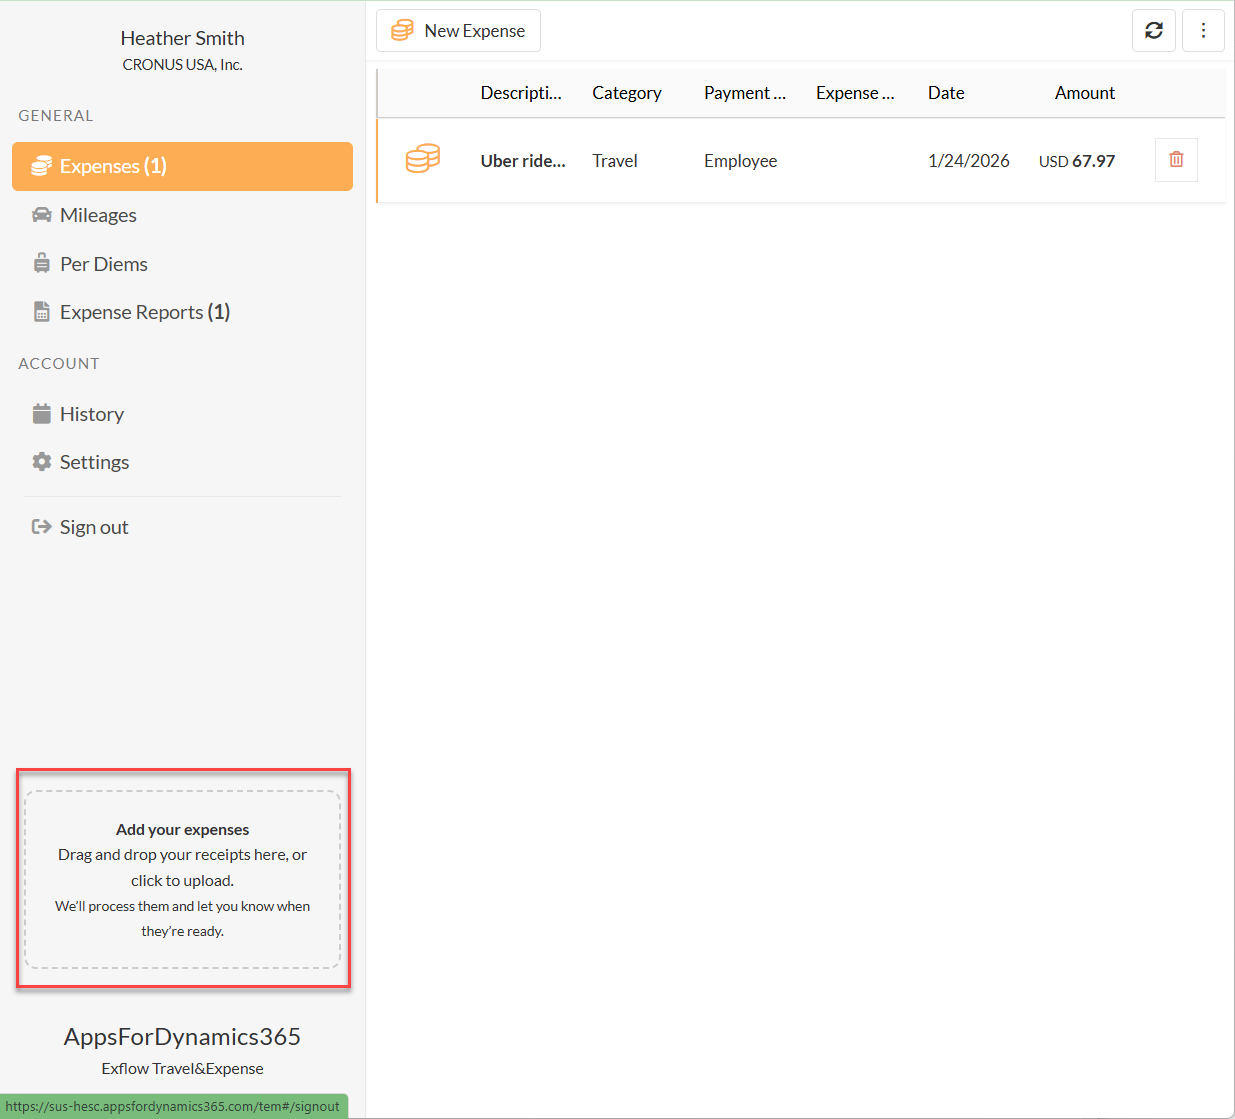
Desde el menú General en el lado izquierdo, seleccione Expenses.
-
Arrastre y suelte su recibo en el cuadro en la esquina inferior izquierda etiquetado Add Your Expenses, o haga clic dentro del cuadro para buscar y cargar el archivo.
-
SmartExtract procesará la imagen del recibo y creará el gasto automáticamente. El gasto aparecerá bajo el menú General en Expenses.
-
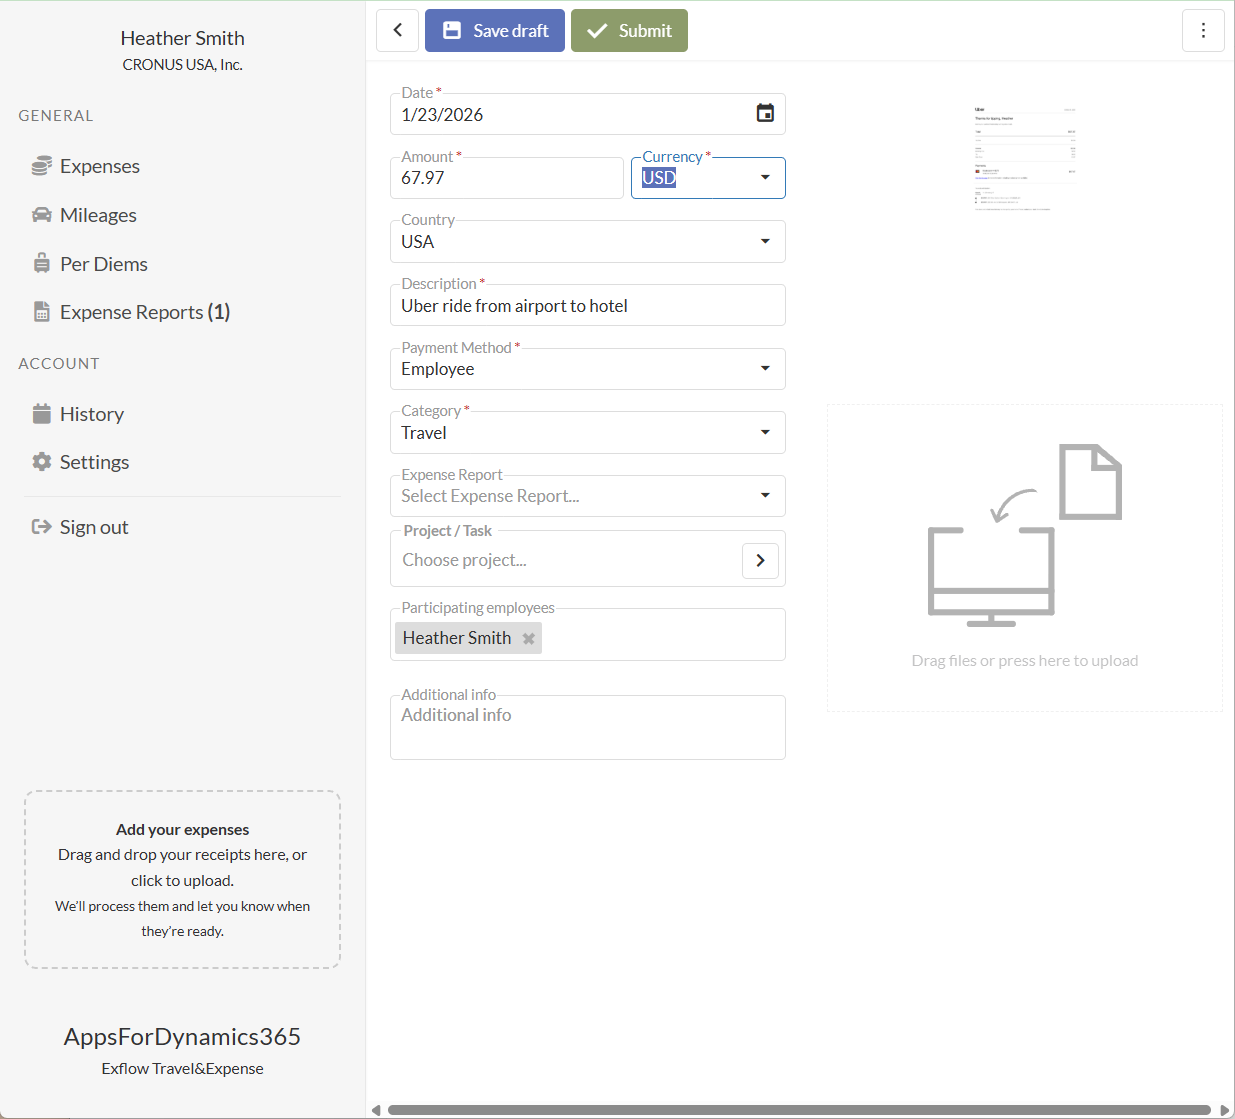
Seleccione el gasto para revisar y actualizar los detalles del gasto para asegurar la precisión. SmartExtract habrá intentado extraer datos del recibo e introducirlos en los siguientes campos.
-
Date: La fecha en que se incurrió el gasto.
-
Currency: La moneda del importe del recibo.
-
Amount: El importe total en el recibo.
-
Country: El país donde se incurrió el gasto.
-
Description: Descripción del gasto.
-
Payment Method:
- Employee – Seleccione cuando el gasto debe ser reembolsado al empleado.
- Company Card – Seleccione la tarjeta corporativa correspondiente si el gasto fue cargado directamente y no requiere reembolso.
-
Category: Seleccione la categoría que mejor describe el gasto.
- Additional Dimension - Si la categoría de gasto seleccionada está configurada para usar una dimensión adicional, este campo aparecerá y le permitirá seleccionar un valor.
-
Expense Report: Opcionalmente seleccione un informe de gastos existente para agrupar este gasto.
-
Project/Task:
- Busque y seleccione el proyecto.
- Busque y seleccione la tarea.
- Una vez seleccionados ambos valores, se muestran las descripciones del proyecto y la tarea.
-
Participating Employees: El empleado que introduce el gasto se añade por defecto. Añada cualquier empleado adicional incluido en el gasto.
-
Guest (Not Employees): Añada fuentes externas, como clientes, para quienes fue este gasto.
-
Additional Info: Introduzca cualquier detalle adicional que pueda ayudar al aprobador a comprender el gasto.
-
-
Guardar o Enviar el Gasto - elija una de las siguientes opciones:
- Save as Draft - Toque Back en la parte superior del formulario para guardar el gasto como borrador. Los gastos en borrador no se envían y pueden editarse más tarde.
- Submit Expense – Deslice su dedo a través de la barra Slide to Submit para enviar el gasto para aprobación.
Entrada Manual de Gastos
-
Abra el Portal Web de Travel & Expense
-
Desde el menú General en el lado izquierdo, seleccione Expenses.
-
Seleccione New Expense en la parte superior de la página para crear un nuevo gasto.
-
Introduzca los detalles del gasto en los siguientes campos:
-
Date: La fecha en que se incurrió el gasto. Este campo se completa automáticamente cuando se adjunta un recibo y se extraen los datos del recibo.
-
Currency: La moneda del importe del recibo. Este campo se completa automáticamente cuando se adjunta un recibo y se extraen los datos del recibo.
-
Amount: El importe a reembolsar o registrar. Este campo se completa automáticamente cuando se adjunta un recibo y se extraen los datos del recibo.
-
Country: El país donde se incurrió el gasto. Este campo se completa automáticamente cuando se adjunta un recibo y se extraen los datos del recibo.
-
Description: Descripción del gasto. Este campo se completa automáticamente cuando se adjunta un recibo y se extraen los datos del recibo.
-
Payment Method:
- Employee – Seleccione cuando el gasto debe ser reembolsado al empleado.
- Company Card* – Seleccione la tarjeta corporativa correspondiente si el gasto fue cargado directamente y no requiere reembolso.
-
Category: Seleccione la categoría que mejor describe el gasto. Este campo se completa automáticamente cuando se adjunta un recibo y se extraen los datos del recibo.
- Additional Dimension Field - Si la categoría de gasto seleccionada está configurada para usar una dimensión adicional, este campo aparecerá y le permitirá seleccionar un valor.
-
Expense Report: Opcionalmente seleccione un informe de gastos existente para agrupar este gasto. Si crea el gasto dentro del informe de gastos, el valor se completará automáticamente.
-
Project/Task:
- Busque y seleccione el proyecto.
- Busque y seleccione la tarea.
- Una vez seleccionados ambos valores, se muestran las descripciones del proyecto y la tarea.
-
Participating Employees: El empleado que introduce el gasto se añade por defecto. Añada cualquier empleado adicional incluido en el gasto.
-
Guest (Not Employees): Añada fuentes externas, como clientes, para quienes fue este gasto.
-
Additional Info: Introduzca cualquier detalle adicional que pueda ayudar al aprobador a comprender el gasto.
-
-
Cargue el recibo arrastrándolo y soltándolo en el área de carga o haciendo clic en la sección para buscar y seleccionar un archivo.
-
Elija Save as Draft para terminar más tarde o Submit para enviar el gasto para su procesamiento.
Opciones Adicionales al Enviar Gastos
ExFlow Travel & Expense tiene opciones adicionales que pueden configurarse para facilitar aún más la introducción de gastos.
Enviar Gastos a Múltiples Empresas de Business Central
Si está asociado con múltiples empresas de Business Central, puede enviar gastos a cada empresa usando el mismo inicio de sesión.
-
Para cambiar entre empresas en el portal web o la aplicación móvil:
-
Acceda a la opción de cambio de empresa en su menú de cuenta.
-
Seleccione la empresa a la que desea enviar gastos.
-
Introduzca y envíe sus gastos como de costumbre.
Nota: Todos los gastos enviados se rastrean por separado para cada empresa, asegurando informes y aprobaciones precisos.

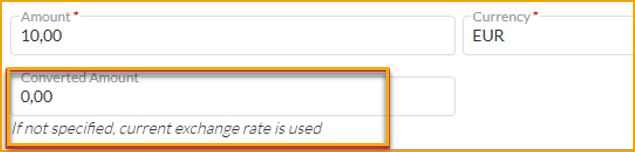
Registrar Conversiones de Moneda en un Gasto
Cuando un empleado incurre en un gasto en moneda extranjera, ahora puede especificar el importe convertido para el reembolso.
-
Si el empleado introduce un importe convertido manualmente, ese valor se utilizará para el reembolso.
-
Si no se especifica ningún importe, el sistema utiliza por defecto el tipo de cambio de Business Central.
Nota: Esto permite a los empleados tener en cuenta las comisiones de conversión de moneda o los importes exactos cobrados por su método de pago.
Cómo Funciona
-
Al introducir un gasto en moneda extranjera en el portal web o la aplicación móvil, se muestran el importe original y la moneda.
-
Si el empleado desea especificar un importe convertido para el reembolso, introduzca el valor en el campo Converted Amount.
-
Si no se introduce ningún importe convertido, el sistema aplica automáticamente el tipo de cambio de Business Central.
-
Envíe el gasto como de costumbre; el importe introducido o calculado por el sistema se utilizará para el reembolso.
Consejo: Use esta función para tener en cuenta las comisiones de conversión de moneda o para coincidir con el importe exacto cobrado por su método de pago.
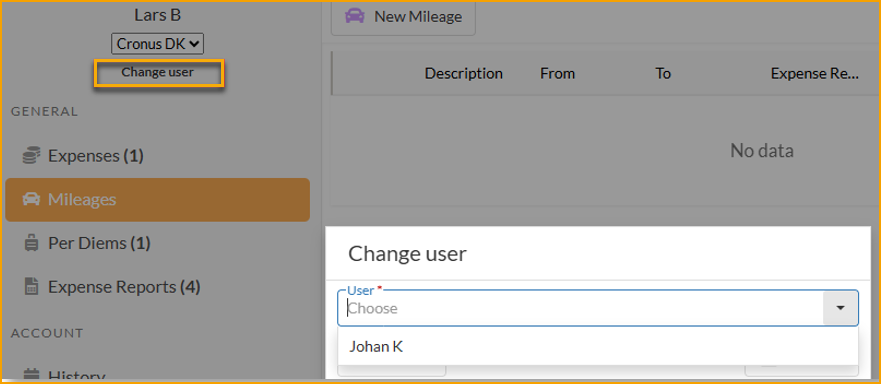
Gestión Delegada de Gastos
La Gestión Delegada de Gastos permite a un usuario gestionar gastos en nombre de otro empleado, por ejemplo, un asistente personal que gestiona los gastos de los miembros del equipo directivo.
Una vez que un usuario está configurado como delegado, puede cambiar a la cuenta del empleado asignado en el portal web o la aplicación móvil y crear o enviar gastos en su nombre. Las acciones disponibles dependen de los permisos asignados al delegado.
Nota: Los delegados solo ven y pueden actuar sobre los empleados que les han sido asignados.
Cómo Funciona
-
Se asigna un delegado a un empleado en la configuración de empleados de Travel & Expense.
-
El delegado inicia sesión en el portal web o la aplicación móvil.
-
El delegado cambia a la cuenta del empleado usando la opción de cambio de cuenta.
-
Dependiendo de los permisos otorgados, el delegado puede:
- Crear nuevos gastos en nombre del empleado
- Enviar gastos para aprobación
- Adjuntar recibos u otra documentación
-
Todas las acciones realizadas por el delegado se rastrean y registran en los registros de gastos del empleado para mayor transparencia.
Consejo: Asegúrese de que los delegados tengan asignados los permisos correctos para evitar errores de envío.
Campos Personalizables en Gastos
Ahora puede personalizar qué campos aparecen para cada categoría de gasto. Por ejemplo, puede especificar si los invitados necesitan ser registrados para una categoría y capturar valores de dimensión usando el módulo de Campos Adicionales.
Diferentes categorías de gasto pueden tener diferentes conjuntos de campos, lo que le permite adaptar el formulario de entrada a los requisitos de su empresa.
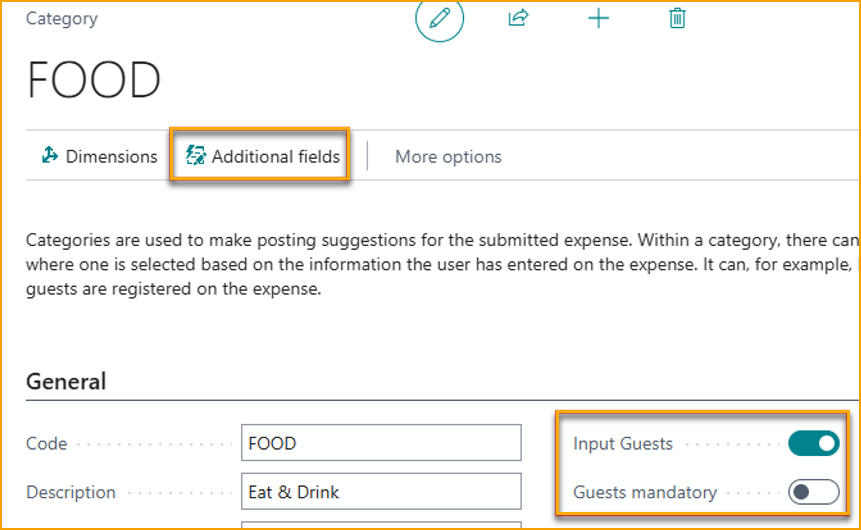
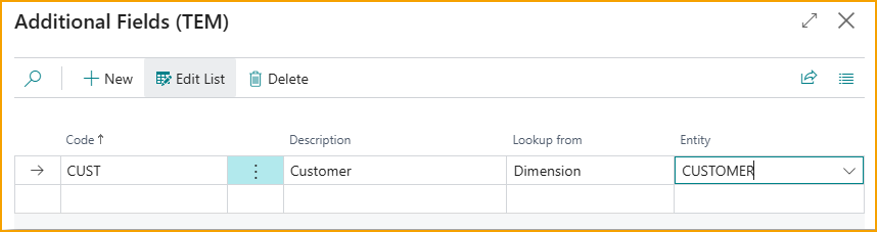
Consulte Setup & Configuration >> Expense Categories para obtener instrucciones de configuración.
Cómo Funciona
-
Al crear un nuevo gasto, seleccione la categoría de gasto.
-
Si la categoría seleccionada está configurada para usar dimensiones adicionales o campos personalizados, los campos correspondientes aparecerán automáticamente en el formulario.
-
Complete el campo según sea necesario, como seleccionar un valor de dimensión o registrar invitados, dependiendo de la configuración de la categoría.
-
El sistema guarda estos valores con el gasto, asegurando informes precisos y el cumplimiento de los requisitos de la empresa.
Nota: Cada categoría de gasto puede tener un conjunto diferente de campos, por lo que los campos mostrados pueden variar dependiendo de la categoría seleccionada.