AppsForDynamics365 Logins
To access the AppsForDynamics365 portal (TEM portal) and use ExFlow Travel & Expense, each user must have an AppsForDynamics365 Login. This login is shared across companies and extends the Business Central Employee by ensuring that employee-specific settings defined in Business Central are enforced in the AppsForDynamics365 portal.
If the Employee Setup section has already been completed, an AppsForDynamics365 login has been created for the employee, and you can skip the steps below.
There are two ways to create an AppsForDynamics365 login, depending on whether the employee already exists as a Business Central user.
- Create AppsForDynamics365 Logins from Business Central Users: This option is preferred if your employees are already set up as Business Central users. This action imports user information directly from Business Central and automatically creates the corresponding AppsForDynamics365 logins.
- Create/Manage AppsForDynamics365 Login Manually Select this option if the employee does not have a Business Central user ID or to manage an existing login.
Create Logins from Business Central Users:
-
From the Travel & Expense Setup – Overview page, select AppsForDynamics365 Logins. All AppsForDynamics365 logins that have been previously created will be displayed.

-
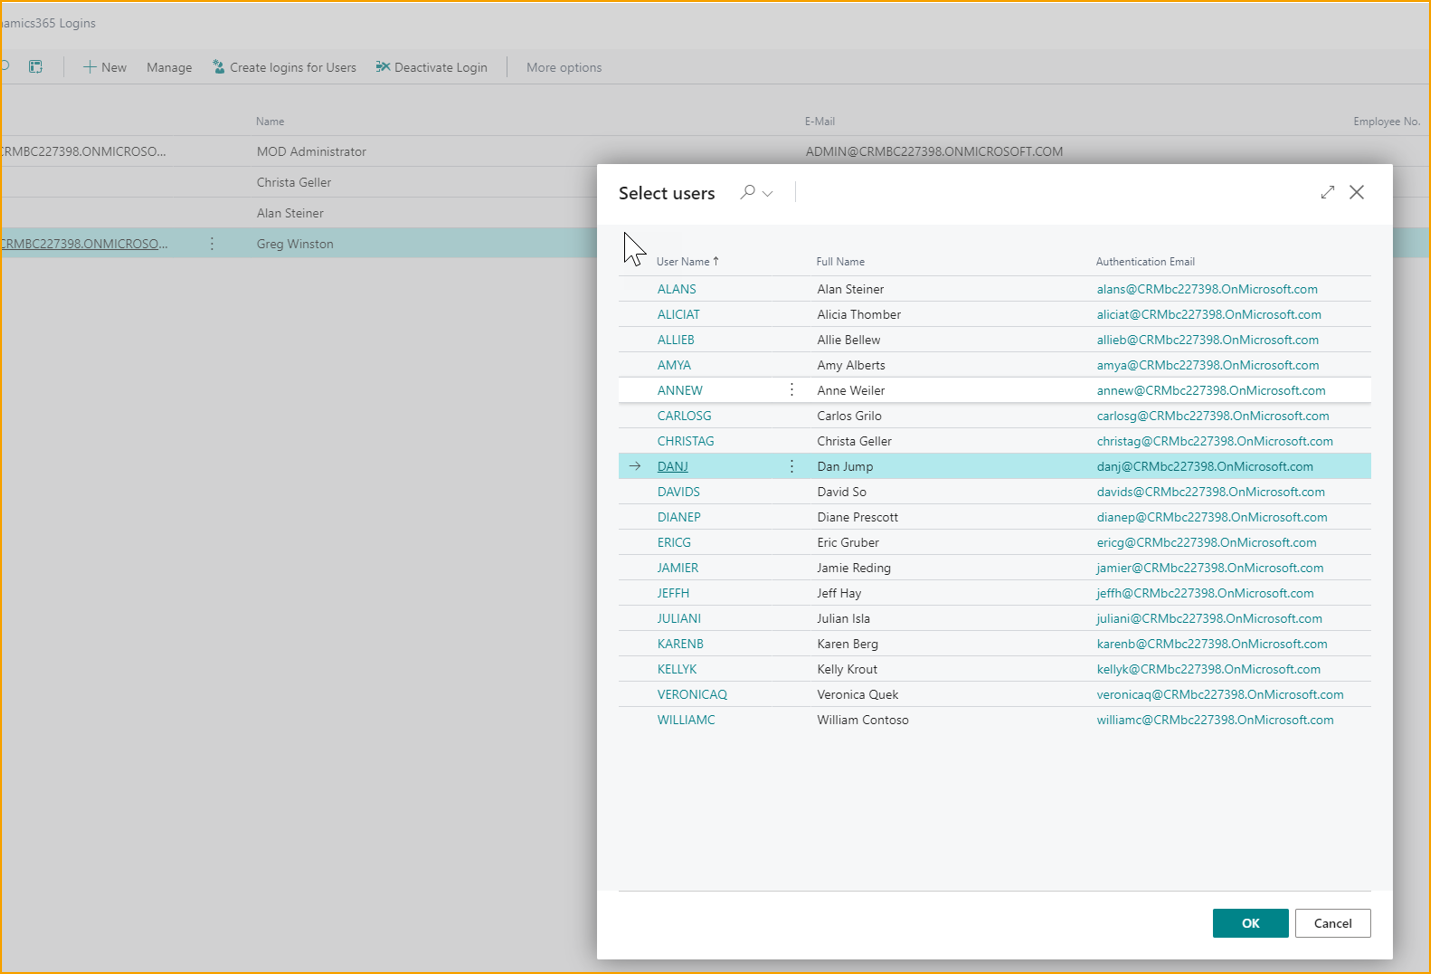
Select Create Logins for Users. This action will import users from Business Central users.
-
Select one or more users from the list, then select OK
-
The selected users are imported and corresponding entries are created on the AppsForDynamics365 User Setup page.
-
To modify any settings, select the user and choose Edit to open the AppsForDynamics365 User Setup page.
Create/Manage AppsForDynamics365 Login
- From the Travel & Expense Setup – Overview page, select AppsForDynamics365 Logins. All AppsForDynamics365 logins that have been previously created will be displayed.
- Select New.
- Complete the AppsForDynamics365 User Setup page.
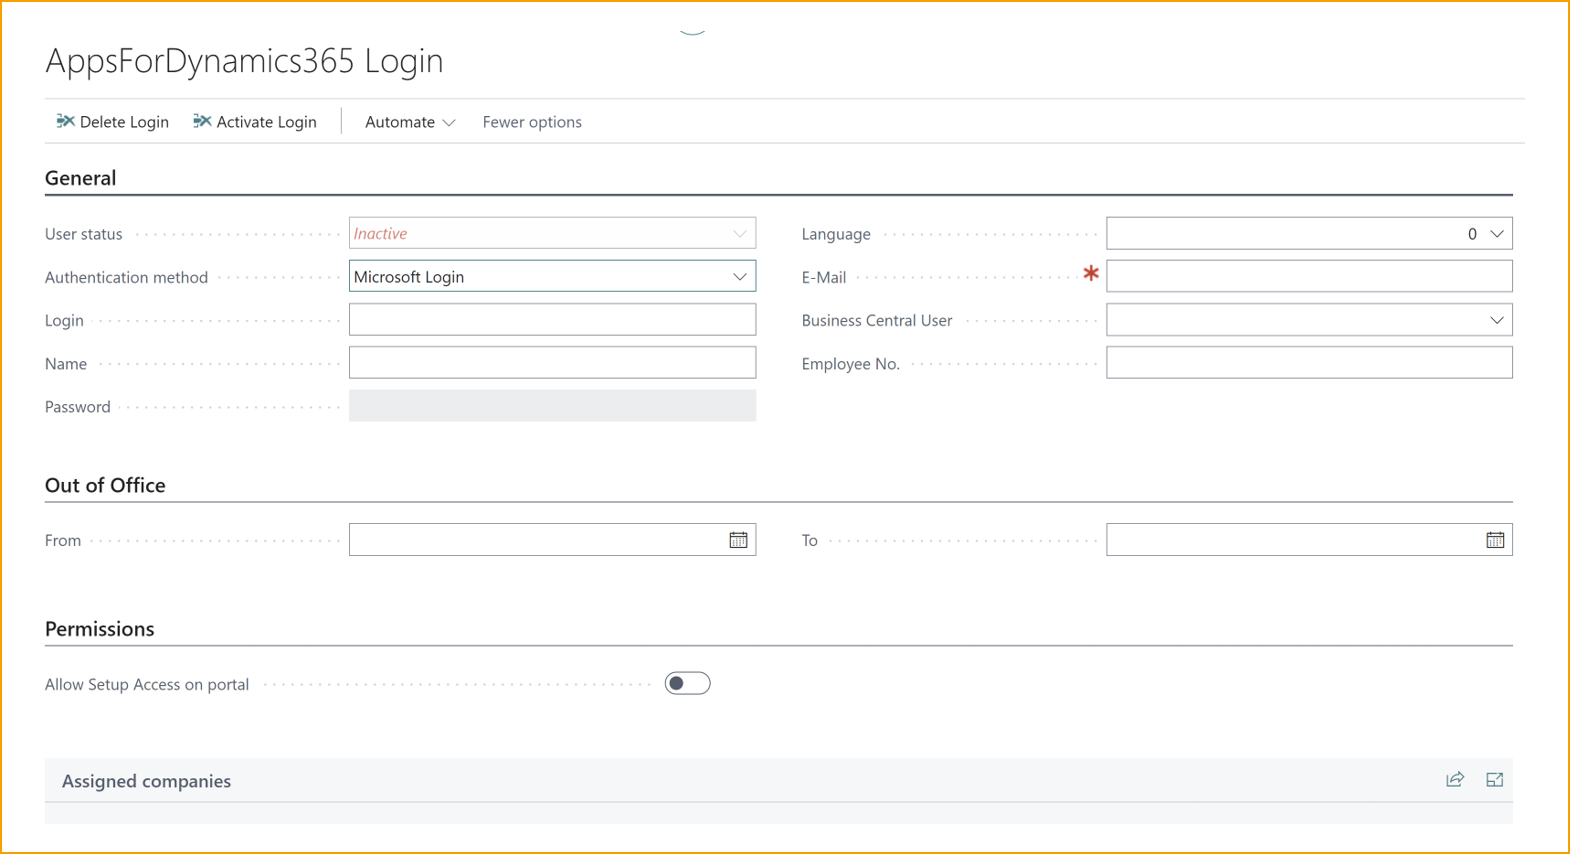
- General
- User Status Indicates whether the user is active or inactive.
- Authentication method Chose the authentication method for the specific user.
- Microsoft login
- User/password
- Login: User ID that user will use to sign in to the portal.
- Name: The full name of the employee..
- Password: The password the user uses to login to the portal. (Only if "user/password" is selected).
- Language: The intended language for the user to use.
- E-mail: The user's email address. This is used for notification.
- Business Central User: Select the Business Central user that this user should be attached to.
- Employee Number: This is the employee number from Business Central associated with the user. It will be automatically filled out when the Configure for TEM is run from the Employee card in Business Central.
- Link the created AppsForDynamics365 login to the corresponding Business Central employee record. For detailed steps, see Employee Setup.
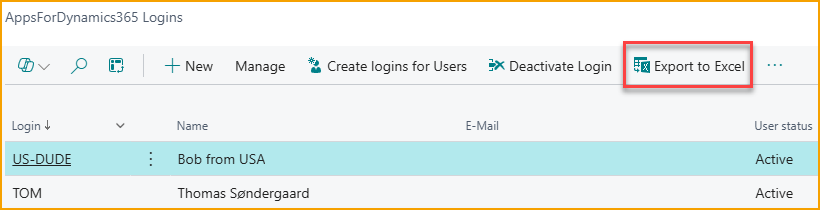
Export / Import AppsForDynamics365 logins
From the Logins page, you can now export all logins to an Excel file, which is useful when moving data from a test environment to production.
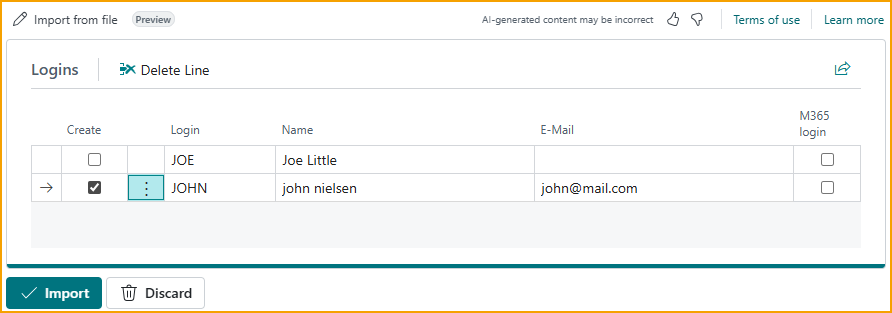
To import logins, either from an exported AppsForDynamics365 login file or from files exported from other system, use the Copilot “Import from file” function.
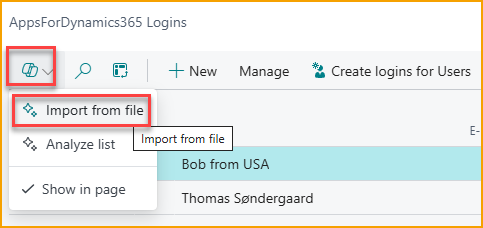
To import logins, use the Copilot “Import from file” function. You can attach either a CSV or an Excel file, and Copilot will automatically analyze the content to identify the relevant information.
For example, a CSV file like this:
Username,First name,Last Name,Email
JOE,Joe,Little,
john@mail.com,john,nielsen,john@mail.com
will result in suggested logins as shown. If everything looks correct, simply select Import and the logins will be created.