Image migration and the new Image tag
Introduction
The Docusaurus sites for DocsBC, DocsFO, and DocsProducts are hosted in Azure as Static Websites, which have a size limit of 500 MB. While the documentation content (such as text and images) does not take up much space, the Docusaurus site itself comes close to this limit. Adding more images can cause the site to exceed the size limit, preventing it from being published.
To address this issue, we use another site, the Landing Page, which does not have the same size limitations. This allows us to move large files, such as images, to the Landing Page and link to them from the other sites.
File migration
File migration involves copying images from DocsBC/DocsFO to the Landing Page site and then deleting them from the local project.
The Landing Page site has its own GitHub repository at LandingPage.
A root folder named "img" has been created there to store all migrated images/files. Currently, the folder structure is organized as follows:

For BC, images are separated into language-specific folders (even though Spanish uses English images). FO has its own "en" folder to maintain consistency across all sites.
Images can be uploaded directly via the GitHub site, or the repository can be cloned locally and used like other sites with Commit/Push workflows.
Linking images
Since the images are now stored on another site, we cannot use the standard method of inserting images in Markdown pages:
[medium](@site/img/media/image200.png)
Instead, we can use the full web address to reference the image directly:
[ExFlow](https://docs.signupsoftware.com/img/BC/en/image200.png)
However, this approach can be cumbersome. Instead, we can use a feature in Docusaurus: Custom React Components.
Custom tags
React, the development platform Docusaurus is built upon, allows you to define custom HTML tags for use in web pages (and Markdown).
One such tag, called <Image>, has been created to simplify the process of linking migrated images. This tag eliminates the need to use full web addresses and file paths.
For example, the image link [ExFlow screenshot](https://docs.signupsoftware.com/img/BC/en/image200.png) can be replaced with:
<Image name="image200.png"/>
The React Component automatically determines the image's location, so only the file name is required.
By default, the component uses English-language images. To use, for example, the German version, you can add a "lang" attribute to the tag:
<Image name="image200.png" lang="de"/>
The component handles the image's location, so no additional file path is needed.
You can also set the image size using the "size" attribute:
<Image name="image200.png" size="large"/>
The only mandatory attribute is "name"; the other attributes are optional.
Using the custom tag
To use the <Image> tag in a .md file, it must first be referenced in the file. This is done by adding an import statement directly under the header:
---
title: Introduction
sidebar_position: 1
hide_title: true
custom_edit_url: null
slug: /user-manual
---
import Image from '@site/src/components/Image'

## Introduction

ExFlow Business Central is a built-in AP and invoice process automation module for Dynamics 365 Business Central.
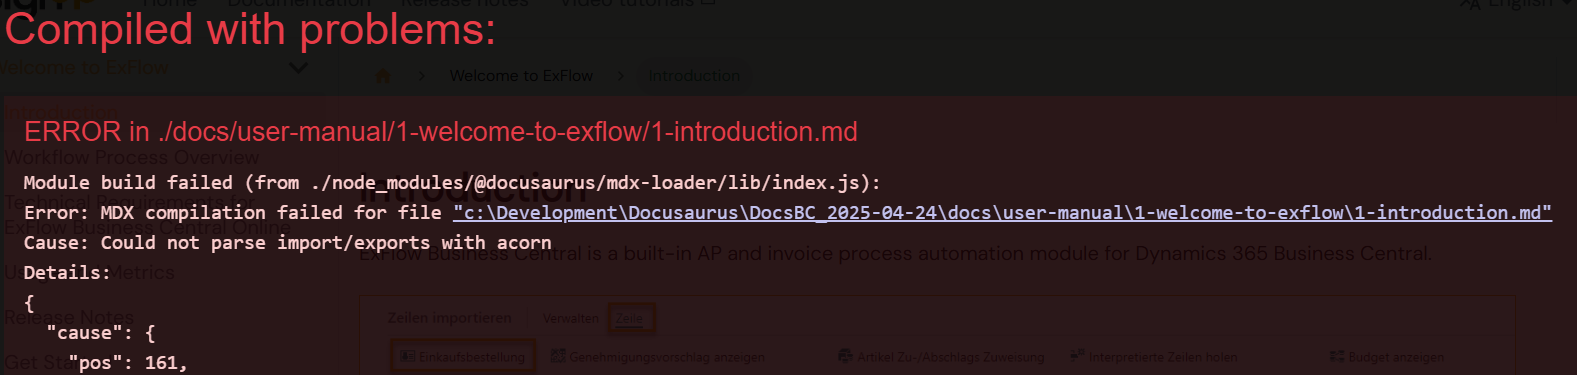
The line import Image from '@site/src/components/Image' must be placed immediately below the last "---" line of the header. Additionally, there must be a blank line directly below it. If you encounter an error message like the one below, it is likely due to these formatting requirements.
Replacing image links, going forward
Manually adjusting the links for hundreds of images across dozens of pages would be impractical. To address this, we have a Python script that automates the process. The script also adds the import line in the correct location.
Moving forward, if we need to add a large number of images, we should first upload them to the Landing Page and then link them using the method described here.