AD FS Manager Configuration
Instructions for configuring AD FS to work with ExFlow On-Prem.
Prerequisites
- AD FS server running and accessible
- The ExFlow web application URL (referred to as
DOMAINbelow) - A Client ID (GUID) for the application
- A Client Secret generated for the server application
1. Create Application Group
In AD FS Management, navigate to Application Groups and create a new group (e.g. "ExFlowOnPrem").
1.1 Server Application

Add a Server application to the group:
- Client Id: Enter the Client ID (must match
Adfs:ClientIdinappsettings.json) - Redirect URIs:
https://DOMAIN/signin-oidchttps://DOMAIN/signout-callback-oidchttps://DOMAIN/Inboxhttps://DOMAIN/SignedOut
- Generate a Client Secret (must match
Adfs:ClientSecretinappsettings.json/secrets.json)
1.2 Web API
Add a Web API to the same application group.
Identifiers
Under the Identifiers tab, add the following Relying party identifiers:
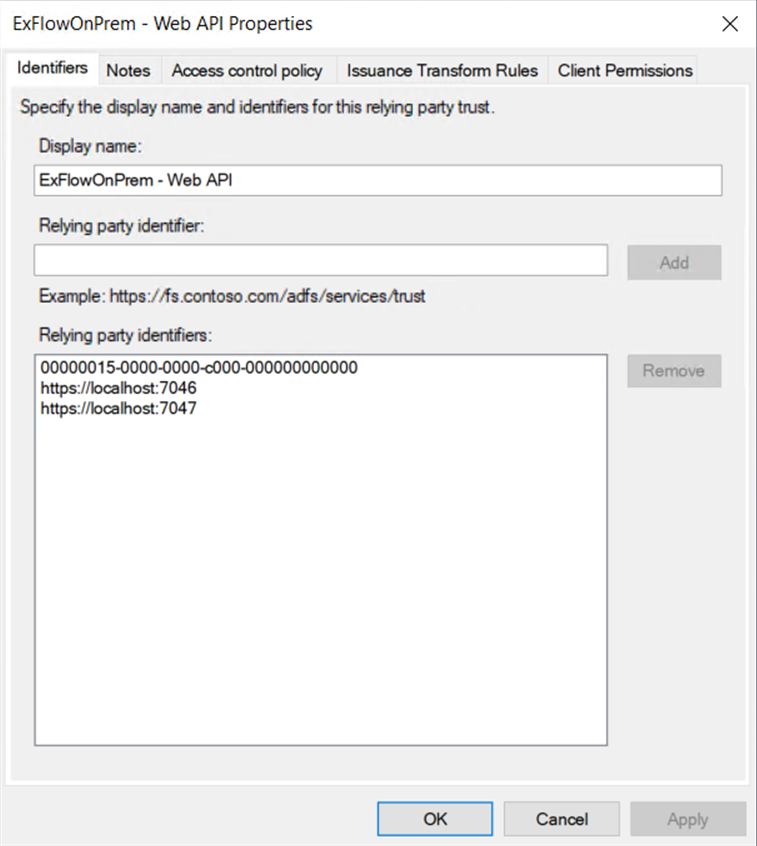
| Identifier | Purpose |
|---|---|
https://DOMAIN:PORT | The ExFlow application URI |
00000015-0000-0000-c000-000000000000 | Microsoft Dynamics 365 resource identifier |
Note: If the Dynamics resource uses a different URI (e.g.
https://ax.onprem.local), add that as an identifier as well. It must match theAdfs:DynamicsResourcevalue inappsettings.json.
Access Control Policy
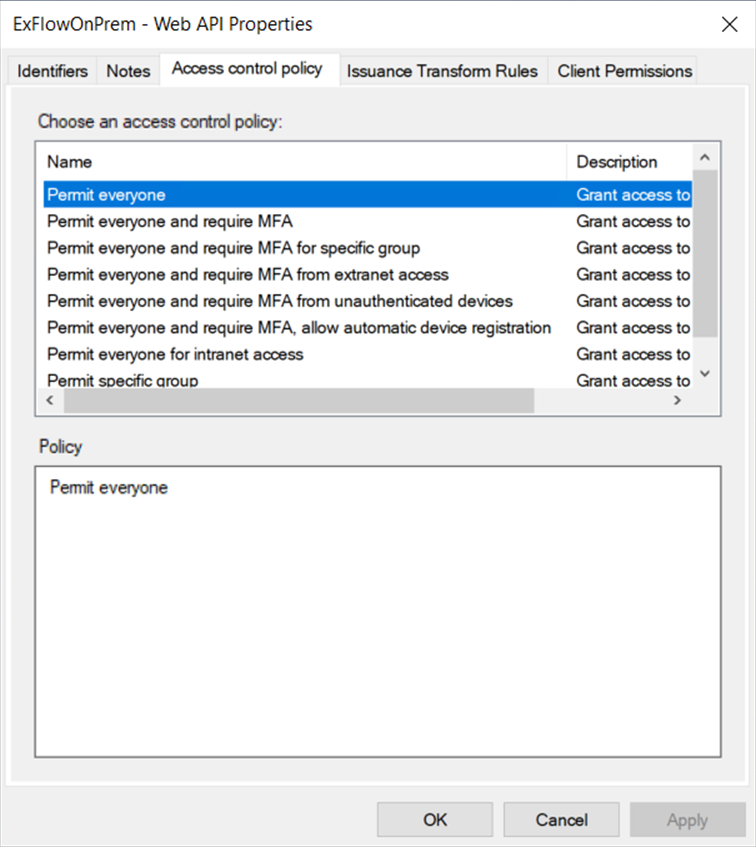
Under the Access Control Policy tab, select the appropriate policy for your environment:
- Permit everyone
- Permit everyone and require MFA
- Permit everyone and require MFA for specific group
- Permit everyone and require MFA from extranet access
- Permit everyone and require MFA from unauthenticated devices
- Permit everyone and require MFA, allow automatic device registration
- Permit everyone for intranet access
- Permit specific group
Issuance Transform Rules
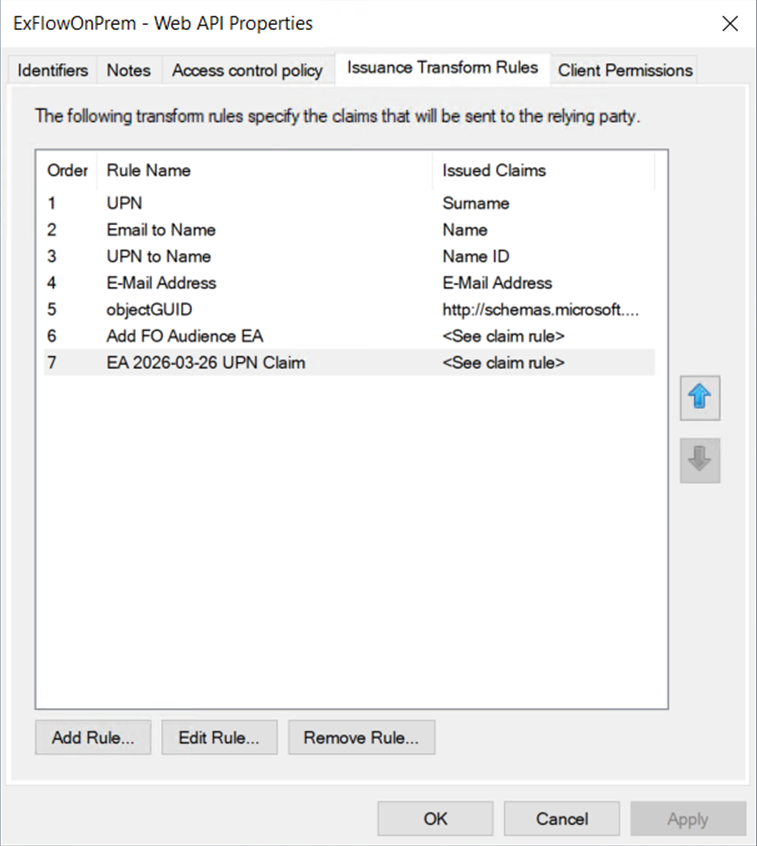
Under the Issuance Transform Rules tab, add the following rules:
| Order | Rule Name | Rule Type | Incoming Claim | Outgoing Claim |
|---|---|---|---|---|
| 1 | UPN | Send LDAP Attributes | User-Principal-Name | UPN |
| 2 | Email to Name | Transform an Incoming Claim | E-Mail Address | Name |
| 3 | UPN to Name ID | Transform an Incoming Claim | UPN | Name ID |
| 4 | E-Mail Address | Send LDAP Attributes | E-Mail-Addresses | E-Mail Address |
| 5 | objectGUID | Send LDAP Attributes | objectGUID | http://schemas.microsoft.com/identity/claims/objectidentifier |
Additionally, add the following Custom Rules (using "Send Claims Using a Custom Rule"):
FO Audience — Ensures the issued token contains the correct audience for Dynamics F&O:
c:[Type == "http://schemas.xmlsoap.org/ws/2005/05/identity/claims/name"] => issue(Type = "aud", Value = "https://ax.onprem.local/");
Note: Replace
https://ax.onprem.local/with your actual Dynamics F&O service address.
UPN Claim — Passes the UPN claim through to the issued token:
c:[Type == "http://schemas.xmlsoap.org/ws/2005/05/identity/claims/upn"] => issue(claim = c);
Client Permissions
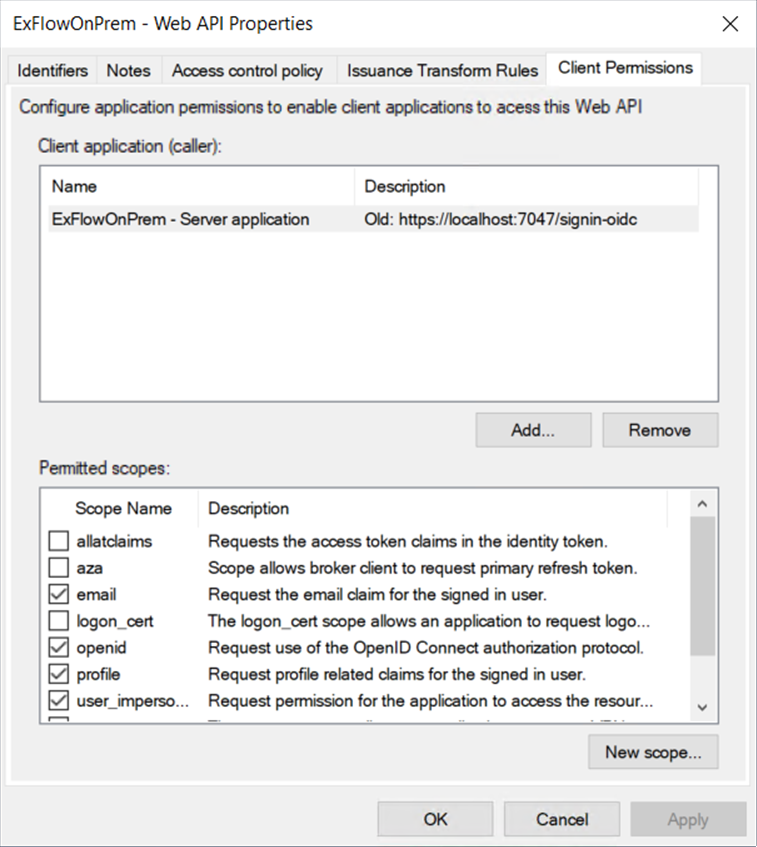
Under the Client Permissions tab, ensure the following scopes are checked (add using New scope... if not present):
openidprofileemailoffline_accessuser_impersonation
Important:
offline_accessis required for the application to obtain refresh tokens, which are used byAdfsTokenAcquisitionto acquire Dynamics-scoped access tokens for WCF service calls.
2. Corresponding appsettings.json Configuration
For reference, the ADFS section in appsettings.json should match the values configured above:
"UseAdfs": true,
"Adfs":
{
    "Authority": "https://YOUR-ADFS-SERVER/adfs",
    "CallbackPath": "/signin-oidc",
    "ClientId": "<Client ID from step 1.1>",
    "ClientSecret": "<stored in secrets.json>",
    "DynamicsResource": "https://ax.onprem.local",
    "MetadataAddress": "https://YOUR-ADFS-SERVER/adfs/.well-known/openid-configuration",
    "NeedsDynamicsTokens": true,
    "RequireHttpsMetadata": false,
    "ResponseType": "code",
    "SaveTokens": true,
    "SignedOutCallbackPath": "/signout-callback-oidc",
    "SkipCertificateValidation": false
}