ExFlow Web F&O OnPrem
Installing the IIS Web App
This guide contains instructions on installing a new ExFlow Web Application in IIS.
Create folder structure and files
- Create the following folder structure on the server:
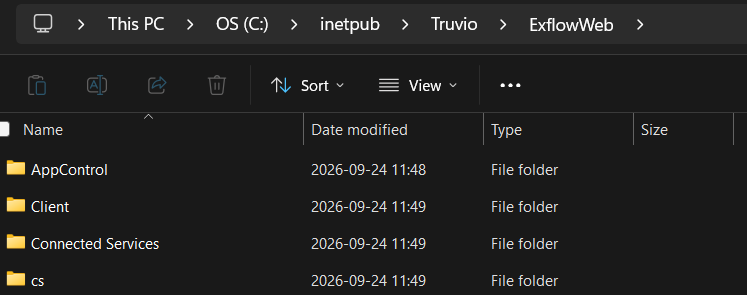
- Unzip the contents of the installation package to the "ExFlow" folder.
Web Application in IIS
Create Web Application
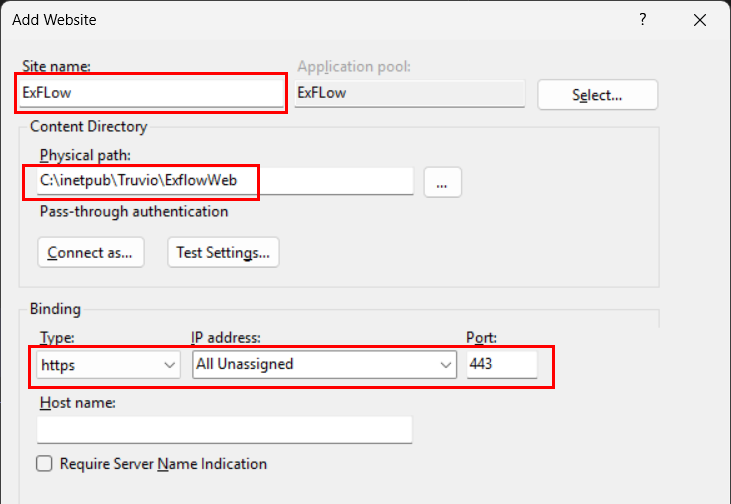
- Open IIS and right click “Sites” > “Add Website...”
1.1 Set site name
1.2 Set “Physical path” to the “ExFlow” folder where you copied the Web Application files to.
1.3 Select Type: https and Port: 443
Configure Application Pool
Go to “Application Pools” and right click the Application Pool > “Advanced Settings”
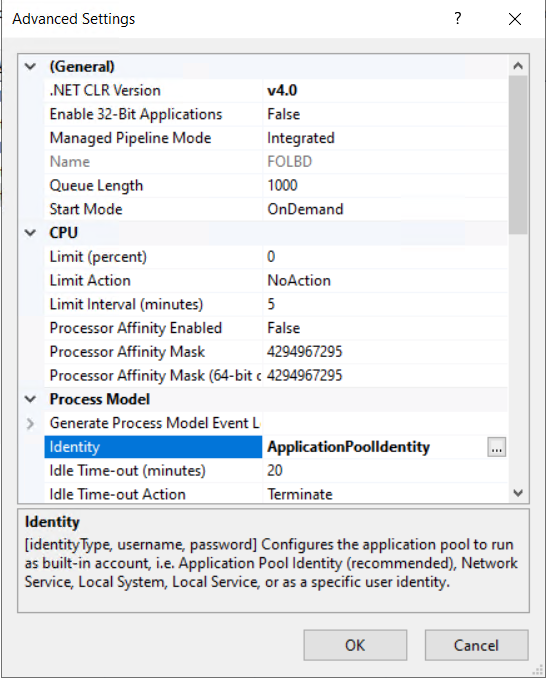
a. Set "Identity" to "ApplicationPoolIdentity"
b. Browse to “C:\inetpub” > Right Click the “Truvio” folder > “Properties” > “Security” and press “Edit”
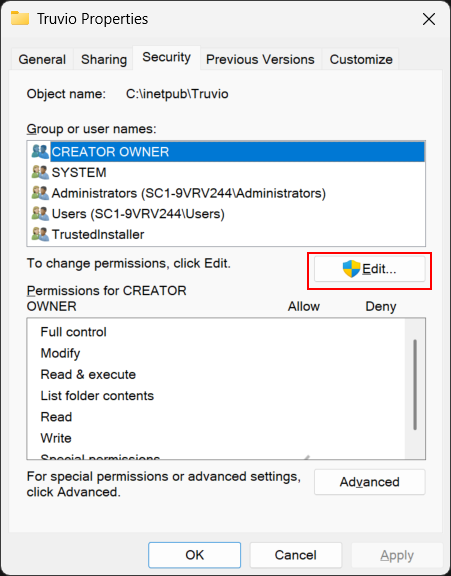
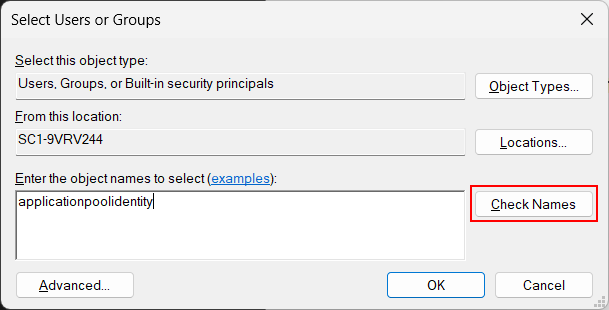
c. Select “Add” and find the application pool identity by typing out the name "applicationpoolidentity" and press “Check Names”
d. Give the account “modify” permission.
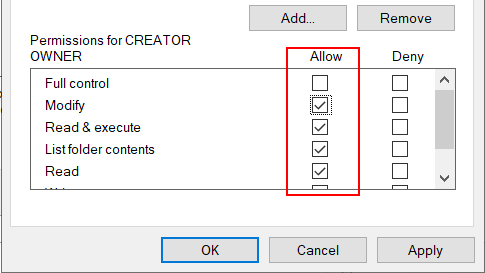
Save the permissions and the webapp should now be ready to go.
SSL/Certificate
The certificate is procured on-site in accordance whith company policy.
To enable the SSL binding, select the newly created site and click "Bindings...":
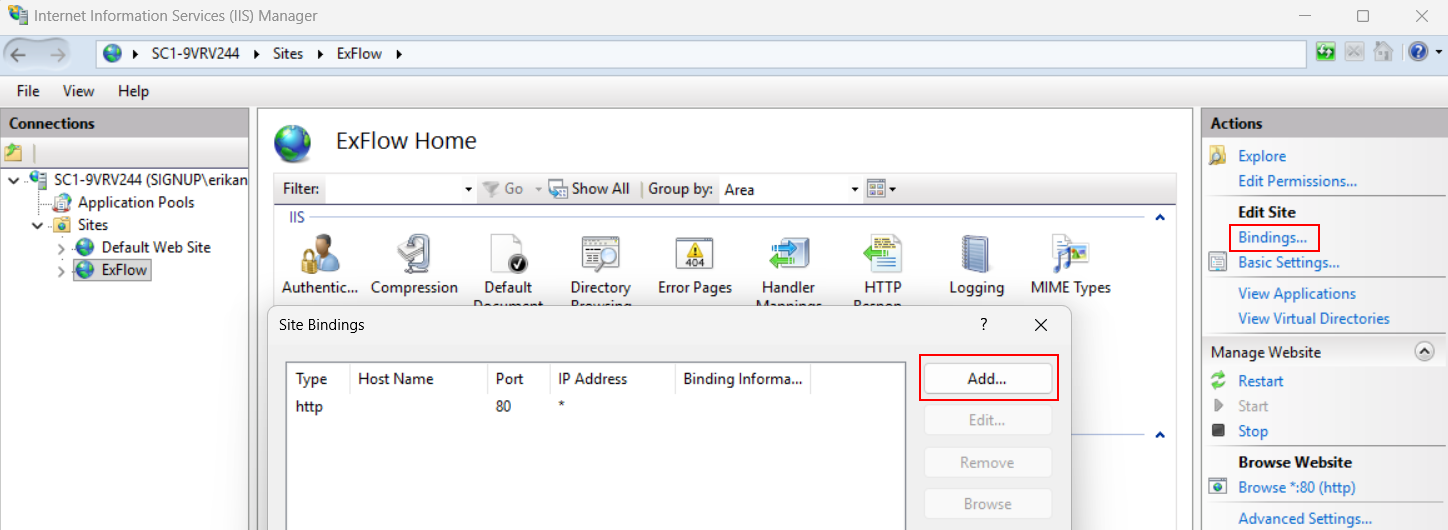
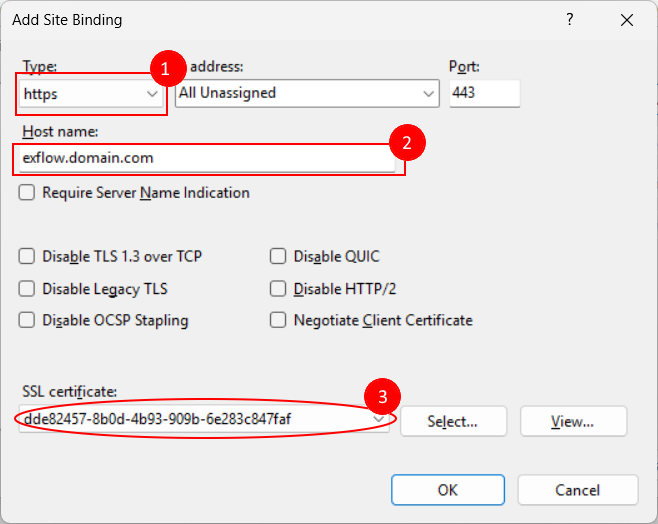
- Select "https"
- Enter the DNS entry
- Select a valid certificate
Configuring appsettings.json
The file appsettings.json can be found in the installation root folder. The configurations are divided into sections:
| Section | Description |
|---|---|
| Logging | Log level settings for application and framework categories. |
| AllowedHosts | Host header filtering setting (* means allow all hosts). |
| AzureAd | Microsoft Entra ID/OpenID Connect settings for interactive user sign-in. |
| AzureAdForApi | Optional settings for bearer-token API authentication mode. |
| HealthCredentials | Credential/token used to authorize detailed health endpoints. |
| AppControl | Main ExFlow functional configuration (FO/BC mode, Dynamics settings, feature behavior, cultures, upload rules, etc.). |
| TelemetryOptions | Telemetry and performance collection toggles. |
| McpServer | Configuration for MCP server metadata and API key. |
| Adfs | Alternative ADFS/OpenID Connect authentication settings. |
There are a few settings that do not fall under a section. The ones that need to be modified are:
HealthCredentials– API key for health endpoints.
The settings for each section that need to be modified are:
AppControl
login/auth settings (Instance, ClientId, TenantId, CallbackPath).
AppControl:Salt– unique per environmentAppControl:FO– set totruefor FO deploymentOnPrem– set to "true"AppControl:Dynamics:ServiceAddress– FO base URLAppControl:Dynamics:ServiceTenantId– FO tenant ID
Adfs
ClientId– Application/client ID registered in ADFS for this appClientSecret– Secret/key used by the app to authenticate with ADFSCallbackPath– Local path ADFS redirects back to after successful sign-inSignedOutCallbackPath– Local path ADFS redirects to after sign-outAuthority– Base ADFS authority URL (issuer/sign-in endpoint root)MetadataAddress– URL to the OpenID Connect metadata documentDynamicsResource– Target Dynamics resource/audience the token should be issued forResponseType– OIDC flow type (code = authorization code flow)
LocalBusinessData
UseAdfs- trueEnableExceptionLogging- falseSqlCacheSettings:AutoCreateTable- trueSqlCacheSettings:ConnectionString- "Server=SQL_SERVER;Database=DB_NAME;Integrated Security=True;TrustServerCertificate=True;"
The connection string shown here is an example, use the type of CS suitable for the local environment.
Troubleshooting
HTTP 500.30 / app fails to start
- Confirm .NET 10 hosting bundle installed.
- Check Windows Event Viewer (Application log).
Dynamics/FO connectivity issues
- Verify
AppControl:Dynamics:ServiceAddressandServiceTenantId. - Verify outbound HTTPS access from server to required endpoints.
- Confirm app identity has correct permissions in FO/Azure AD.