Coding and Approvals
TruvioSense Coding & Approvals brings AP invoice control to modern scale. Where traditional invoice processing relies on manual review and spot-checks, TruvioSense validates 100% of invoices against historical patterns — automatically flagging anomalies, predicting coding, and automating posting based on risk threshold.
The result is an AP process that handles more volume with greater accuracy, while keeping your team in control of the exceptions that actually need their attention.
What TruvioSense Coding & Approvals does
Every invoice that enters the system is evaluated against your organization's historical data. TruvioSense assigns a confidence score and a risk score to each invoice, giving the system — and your team — a clear basis for deciding how to handle it. Low-risk invoices that match established patterns can be posted automatically. Invoices that deviate from expectations are flagged for review.
This means touchless processing where it's safe, and targeted human attention where it matters.
Key capabilities
| Capability | Description |
|---|---|
| Confidence & risk scoring | Every invoice is scored against historical patterns — high-confidence invoices flow through automatically, while anomalies are surfaced for review |
| Predicted coding | TruvioSense predicts the correct ledger coding based on past transactions, reducing manual input and coding errors |
| Live translations | Invoice content is translated in real time, enabling consistent processing regardless of the supplier's language |
| Automated posting | Invoices that meet your defined risk threshold are posted automatically — no manual intervention required |
| Intelligent search | Quickly locate invoices, vendors, or transactions using context-aware search across your invoice data |
Getting started
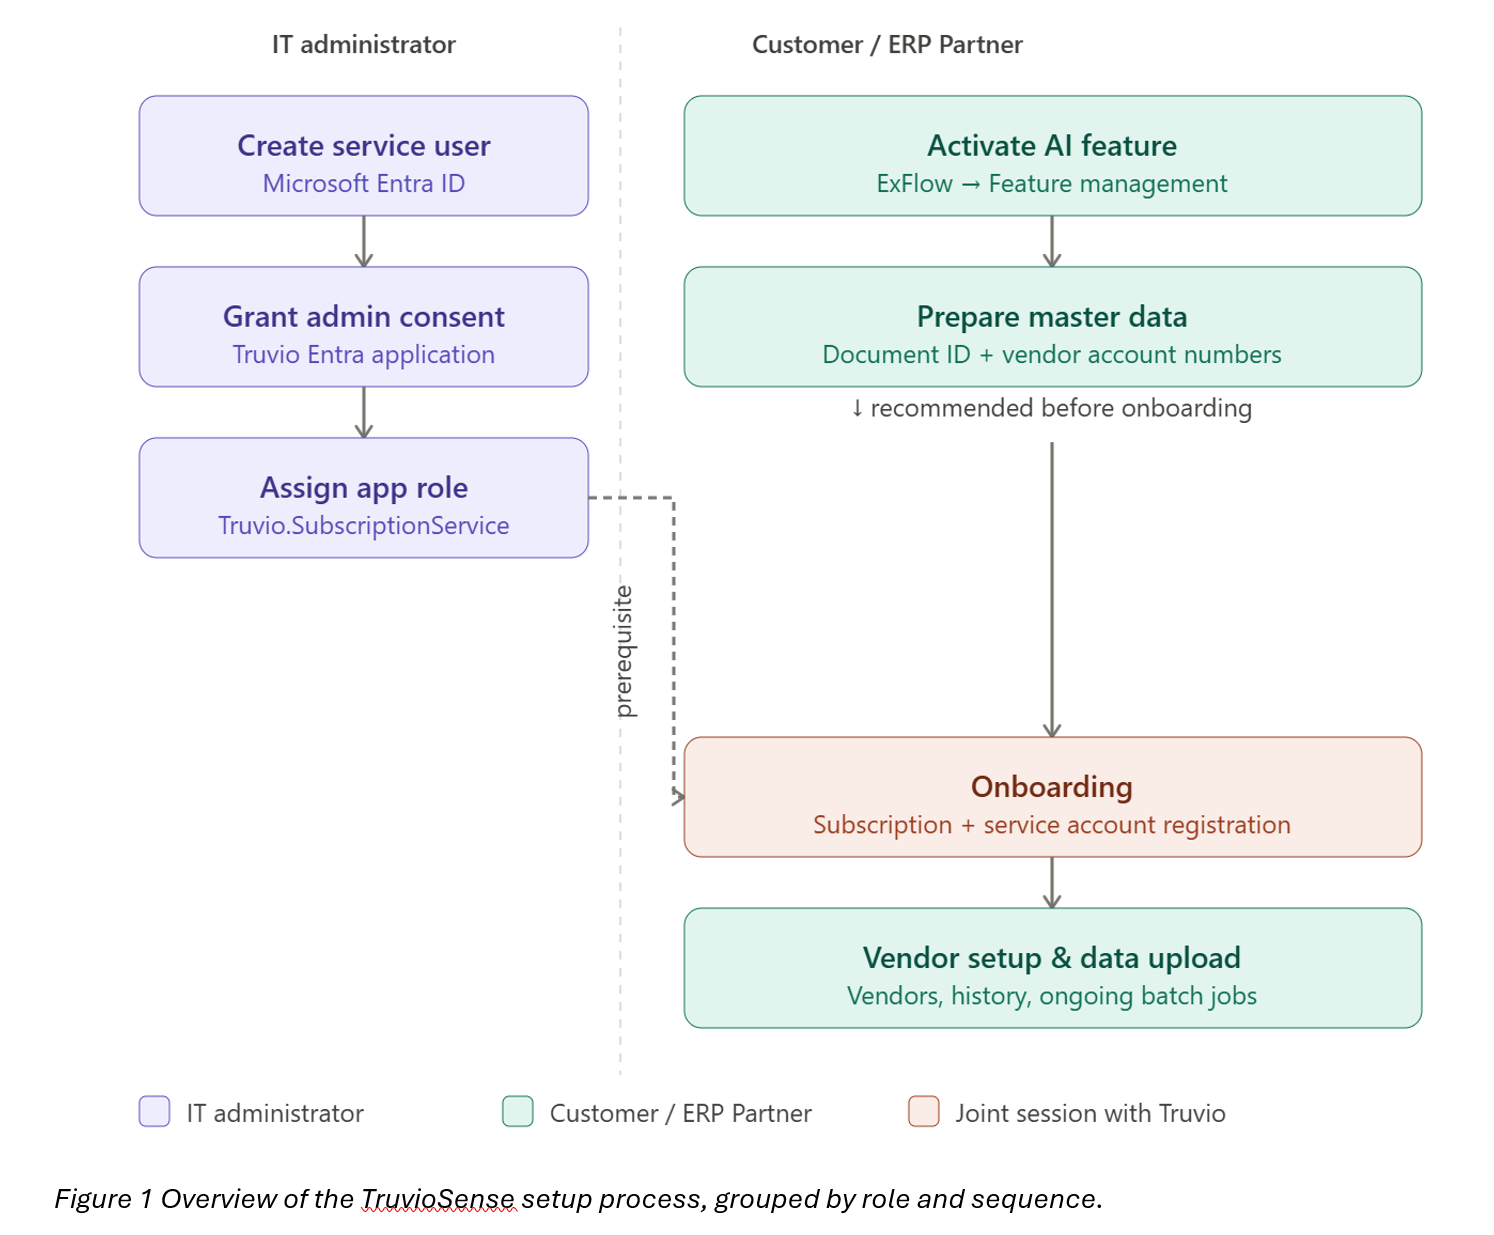
This guide covers the full process for starting with TruvioSense Coding and Approvals in D365FO, from preparing master data and onboarding to setting up the first vendors.
The process involves two distinct roles: the IT administrator, who prepares the Microsoft Entra tenant, and the Customer/ERP Partner, who configures the ERP and uploads data.
The IT administrator steps are a prerequisite for onboarding and can be completed independently in advance. Onboarding itself is conducted as a joint session with Truvio representatives.
To accelerate time-to-value, it is recommended to activate the AI feature and prepare master data before the onboarding meeting.
IT Admin Setup Guide
The first section of this guide is intended for IT administrators who are preparing a Microsoft Entra tenant for the Truvio Core API integration.
To enable secure communication between the TruvioSense AI service, a dedicated service user needs to be created.
Before the service user can sign in
Before the service user can sign in from the ERP to the Core API, an IT administrator must:
- Ensure a dedicated service user exists in Microsoft Entra ID that will be used to authenticate from the ERP.
- Grant tenant-wide admin consent to the Truvio Entra application.
- Assign the Truvio.SubscriptionService app role to the service user.
Once these prerequisites are complete, the service account can be used to sign in from the ERP to connect to the Core API.
Prerequisites
- An account with permission to grant tenant-wide admin consent for applications in Microsoft Entra (typically a Global Administrator or Privileged Role Administrator).
- Access to the Azure portal with rights to manage Enterprise applications in your tenant.
- A service user available in Microsoft Entra ID (create one if it does not already exist).
This guide describes the steps a Microsoft Entra administrator must complete before a user can sign in from the ERP to the Truvio Core API.
Step 1: Prepare a Service User in Entra
Create (or identify) a dedicated service user in Microsoft Entra ID that will be used to authenticate from the ERP to the Core API. The service user should be a standard member account in your tenant. Treat the credentials as a shared service identity and store them securely.
Step 2: Grant Admin Consent to the Truvio Entra Application
As a tenant administrator, open the admin consent link below in a browser and sign in with an account that has permission to grant tenant-wide consent.
Review the requested permissions and click Accept to grant tenant-wide consent.
After consent is granted, the Truvio application will appear in your tenant under Microsoft Entra ID -> Enterprise applications.
Step 3: Assign the Truvio.SubscriptionService App Role to the Service User
- Sign in to the Azure portal.
- Navigate to Microsoft Entra ID -> Enterprise applications.
- Locate and open the Truvio application that was consented in Step 2.
- Go to Users and groups -> Add user/group.
- Under Users, select the service user created in Step 1.
- Under Select a role, choose Truvio.SubscriptionService.
- Click Assign.
Only principals that have been assigned the Truvio.SubscriptionService app role will be able to authenticate to the Core API.
Step 4: Sign In from the ERP with the Service Account
This step is done during the onboarding meeting with Truvio representatives.
Troubleshooting
- "Consent required" during sign-in – Confirm that Step 2 was completed by a tenant administrator and that the Truvio application is visible under Enterprise applications.
- "Access denied" from the Core API – Confirm that Step 3 assigned the Truvio.SubscriptionService role to the correct service user.
- Incorrect account signed in – Ensure the ERP is signed in with the service user, not a regular user account.
Prepare master data
Activate the AI feature
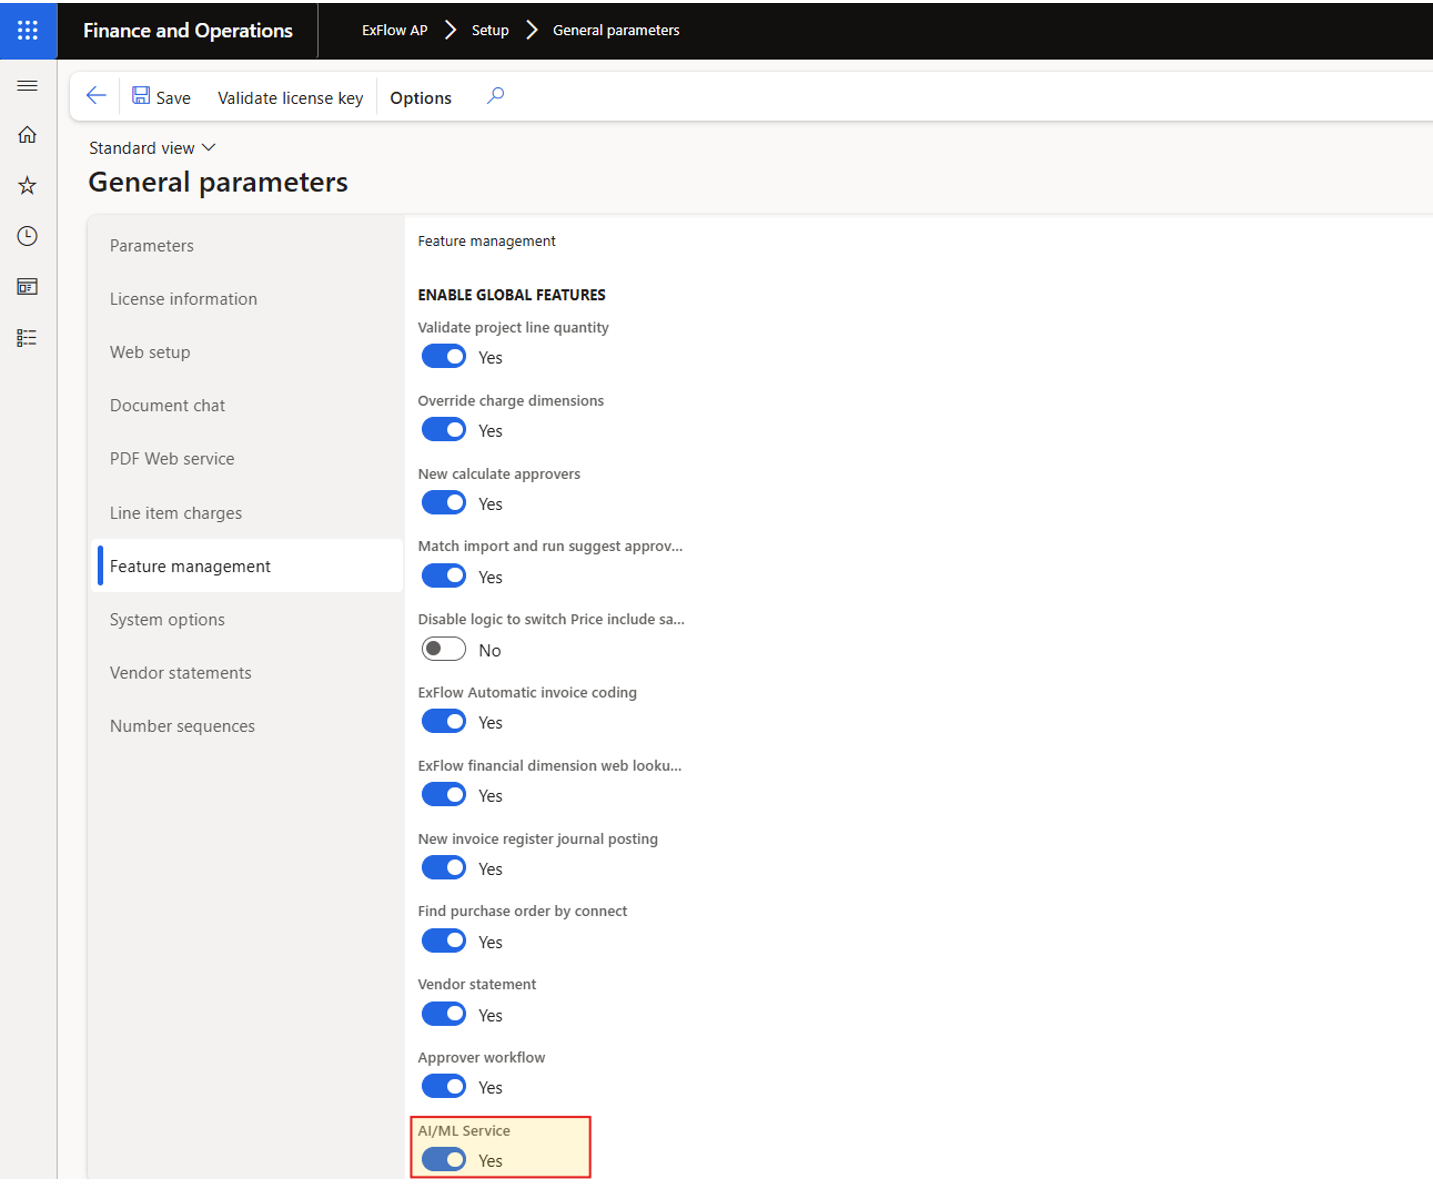
To enable the menu items for TruvioSense, activate the feature AI/ML Service.
- ExFlow -> Setup -> General parameters -> Feature management
- Save and refresh the page
Update Document ID
All “old invoices” must be populated by a unique DocumentID/Document ML.
This batch job will populate the old invoices with a unique DocumentID.
This is required for the AI service to keep track of imported invoice data. Recently received and new invoices will be populated with a DocumentID automatically.
- ExFlow > Setup > TruvioSense Coding & Approvals > Setup vendors > More > Set GUID on Processed.
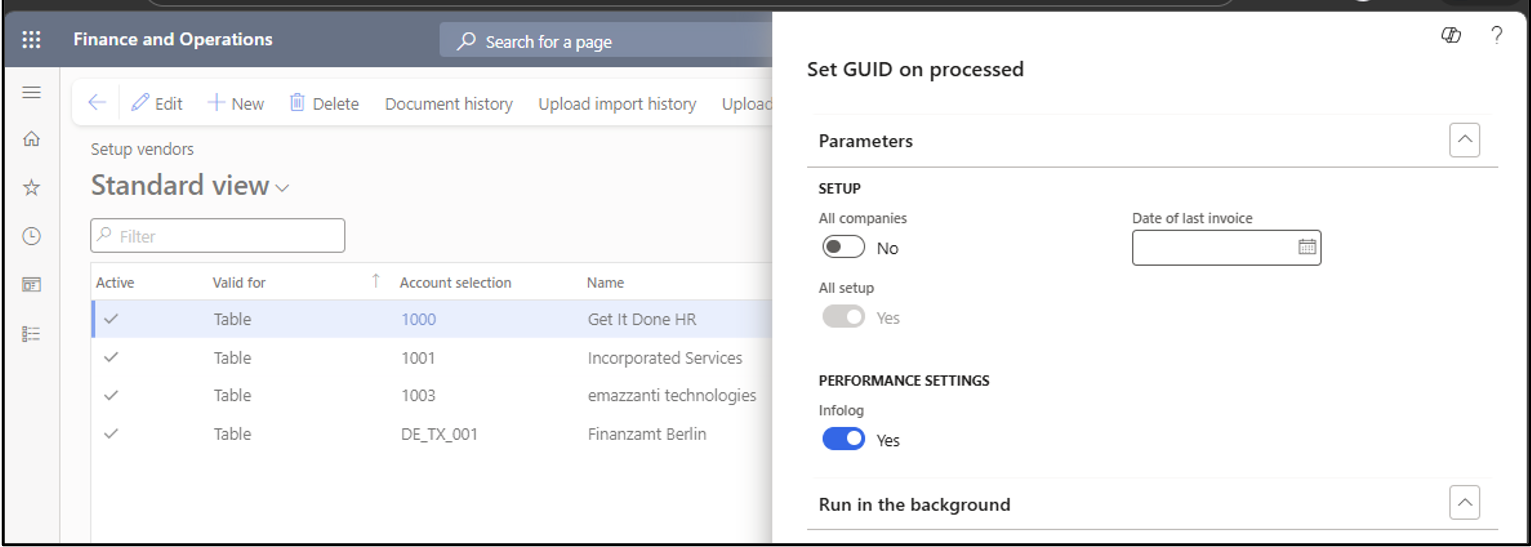
- Set Date of last invoice. For example, if ExFlow has been in use since 2021, but you want the AI service to use only invoices from 2025 and onwards as its basis, set the date to 01.01.2025.
- If the AI service is intended to be used across all companies and the “Date of last invoice” will be the same for all companies, the job can be run with “All companies” enabled. Otherwise, the job must be run separately for each company.
- Press OK button.
- Depending on the volume of invoices, this job may take several hours to complete. It is therefore recommended to run it as a one-time batch job.
- When the job is completed, make sure the DocumentID is populated with GUID values in Import history form, according to the selected date.
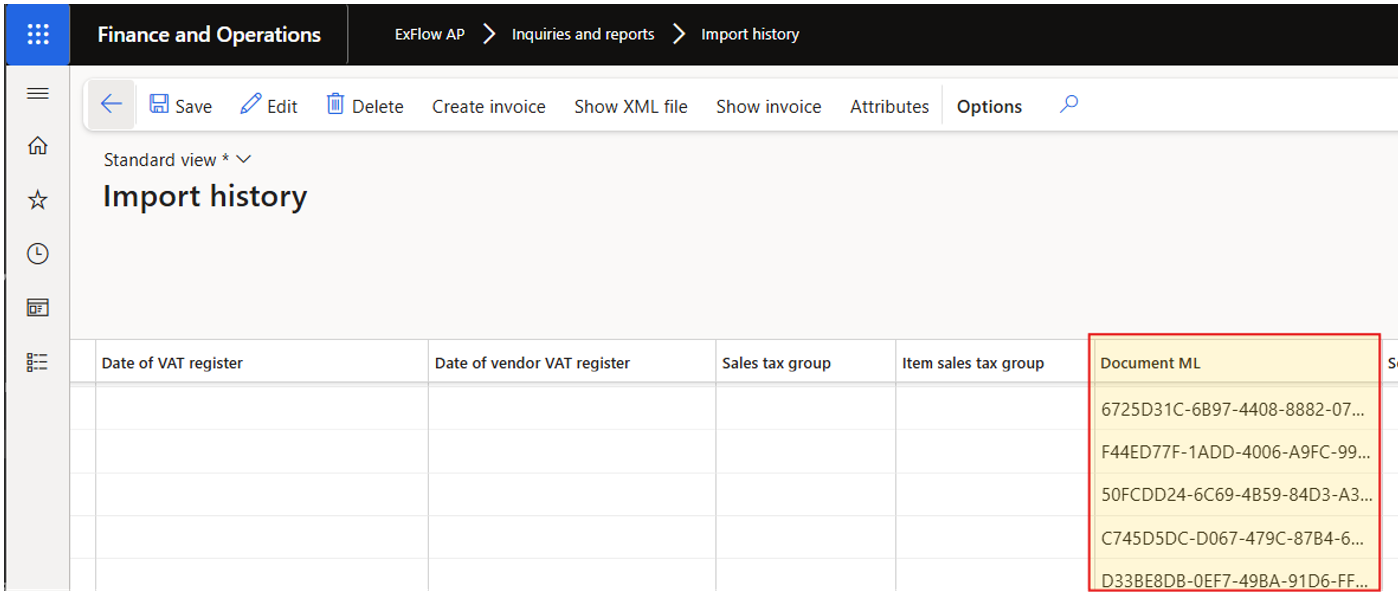
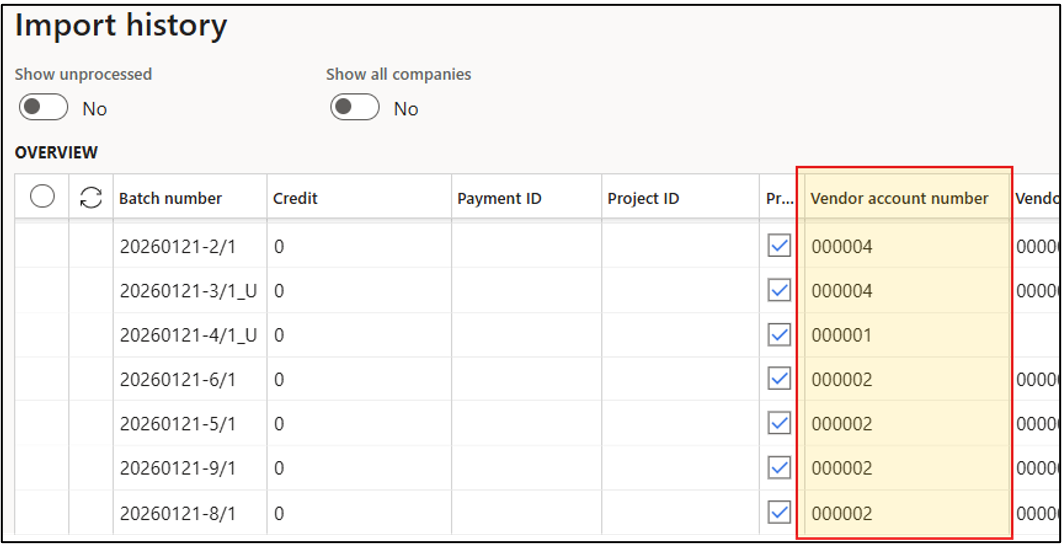
Set vendor account number in Import history
The vendor account number field in Import history is required to have D365FO AccountNo populated on imported invoice data.
If you only receive invoice data from ExFlow Data Capture, the VendorID is normally already set.
If you receive invoices from other sources (other OCR tools and/or eInvoices), the VendorID needs to be populated on the received invoice data in Import history.
- ExFlow -> Periodic tasks -> TruvioSense Coding & Approvals -> Set vendor.
- Depending on the volume of invoices, this job may take several hours to complete. It is therefore recommended to run it as a one-time batch job. Press “OK” button to execute/schedule job.
Make sure Vendor account number is populated with Account number values in Import history:
Onboarding
The onboarding steps described in this section are done in an onboarding meeting with Truvio representatives.
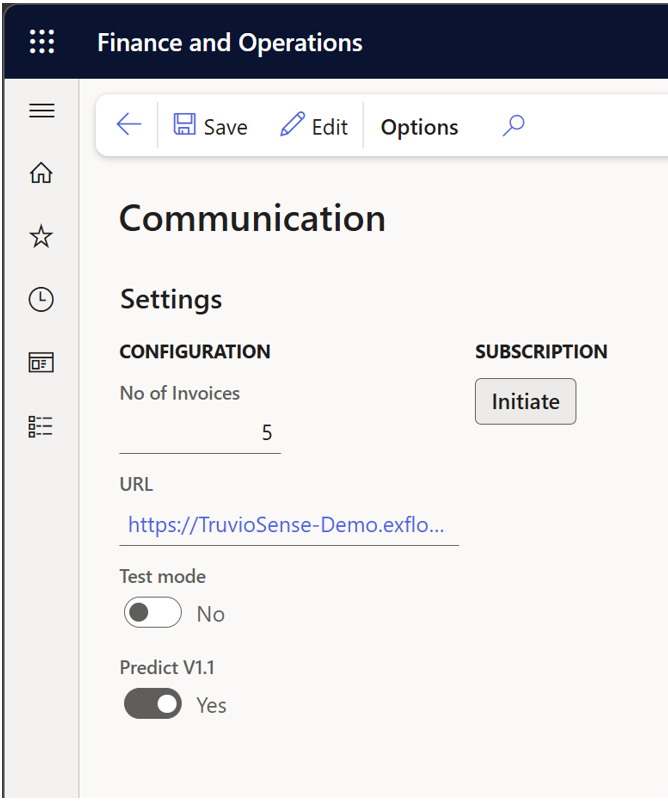
Create subscription
- ExFlow AP -> Setup -> Coding & Approval -> Communication
- Press “Initiate” button
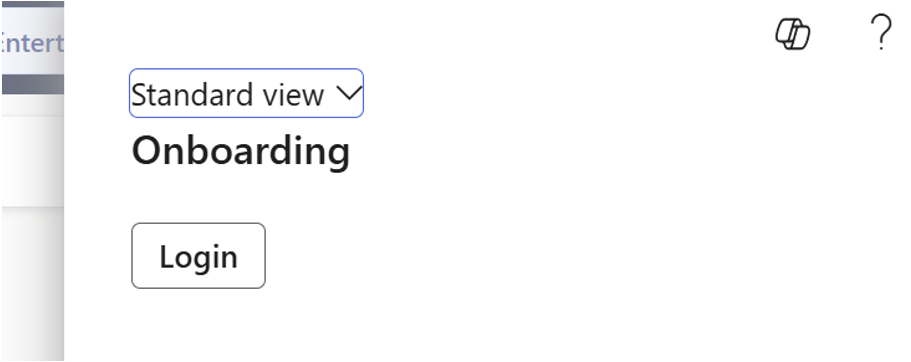
Register service account
- ExFlow Core -> Common -> Subscriptions
- Action pane: General -> Onboarding
- Press “Login” button
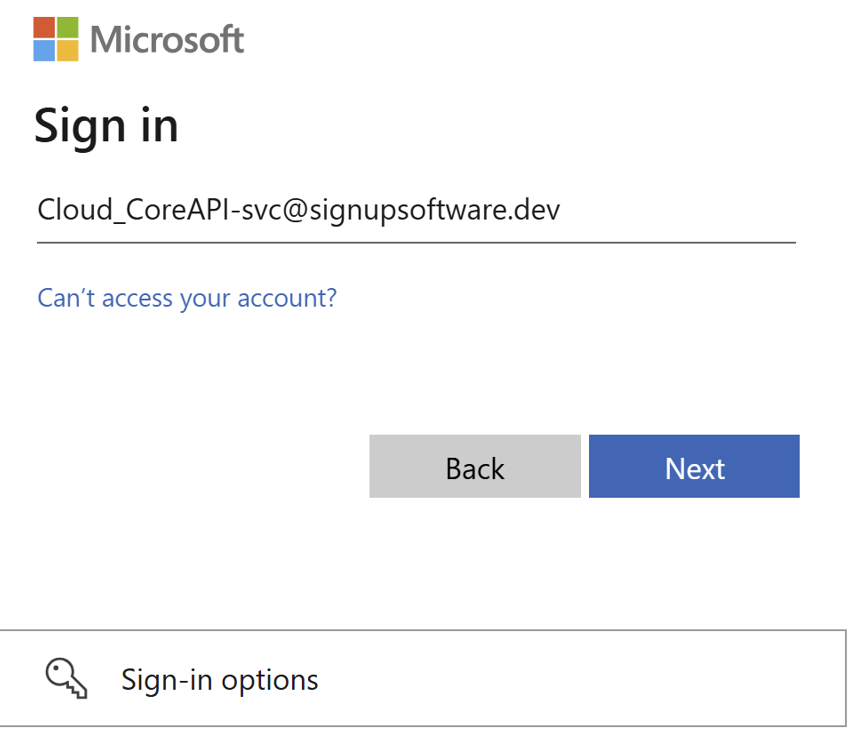
- Confirm terms & policies
- Press “Continue to Login”

- Enter the service account credentials, press “Next” button and get authenticated
A registration has now been created as a Pending Deployment Request. Before proceeding, a Truvio representative must approve the request.
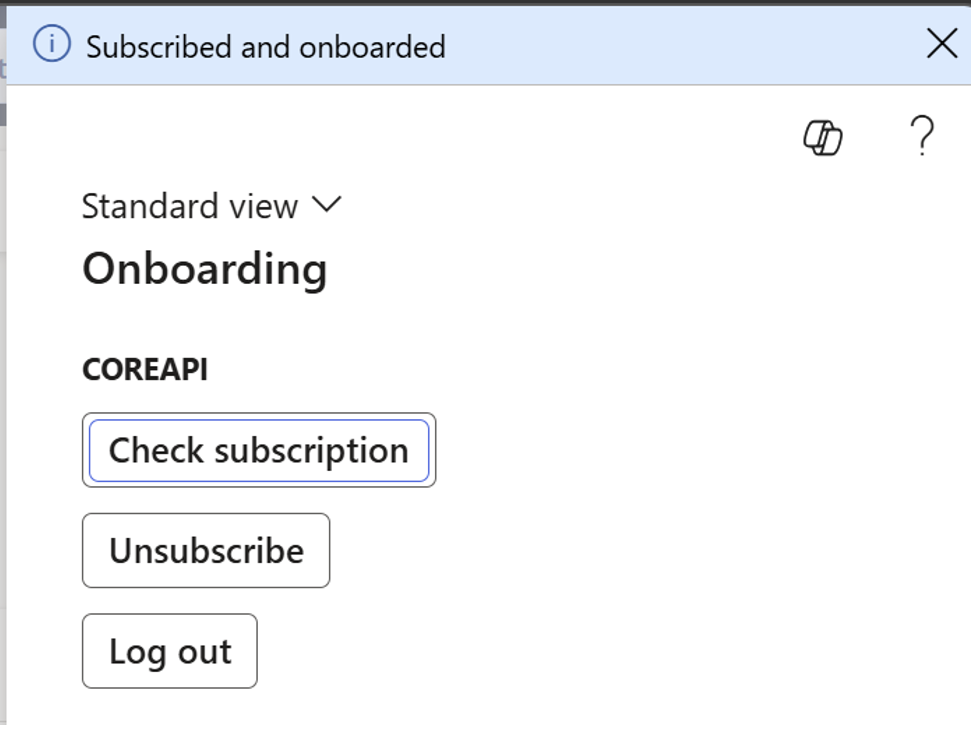
- Press button “Check subscription” to make sure there is a registration and waiting for approval.

Check Subscription
After the request has been approved by Truvio, the subscription status will be updated to onboarded.
- Press button “Check subscription” to make sure the account is subscribed and onboarded.

Setup vendors for AI
This defines which vendors to apply coding prediction for and prepares existing import history data in ExFlow.
Add vendors and define settings
ExFlow -> Setup -> TruvioSense Coding & Approvals -> Setup vendors
- Press “New” button and select vendors to use for initial learning.
- Define initial quantity (inherited from “Communication”). Recommended using at least 10 documents.
- Set confidence threshold for auto applying coding prediction to 100% (adjust later if required)
Base Data Upload
Uploads data to the AI Services for learning purposes to be able to predict coding for invoices per vendor.
Import history data
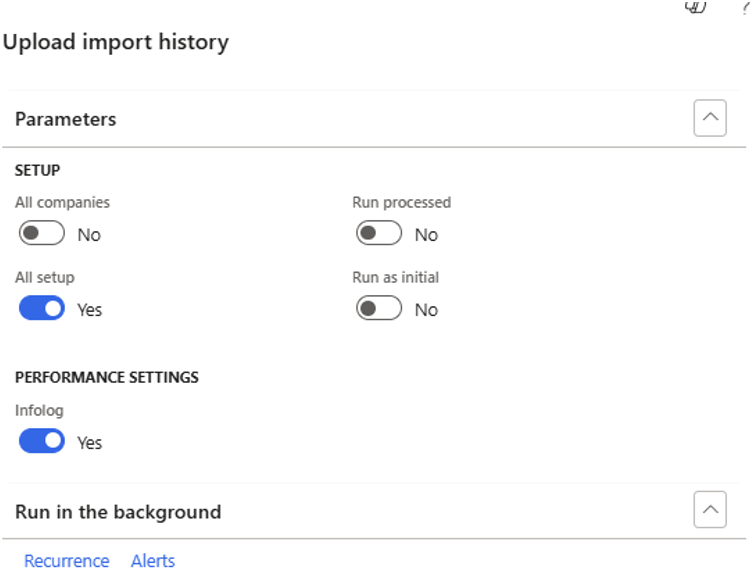
To upload document data for old invoices, use the job "Upload import history.
ExFlow AP -> Periodic tasks -> TruvioSense Coding & Approvals -> Upload import history.
 ,
,
Settings
- All companies: Run for Active company or all companies.
- Run as initial: Yes – Upload those Processed invoice documents according to defined setting per vendor; No – Upload Unprocessed only.
- Run processed = Yes - Only processed from import history, No – Only unprocessed from import history. Always use same setting as #2.
- All setup = Yes - Only.
- Press “OK” button.
Data from import history will be included;
- EDC: PDF + XML
- E-invoicing (Tickstar/Pagero): XML (optional PDF)
- Generic XML: XML (optional PDF)
The job uploads the data to a customer specific Truvio Azure Storage location.
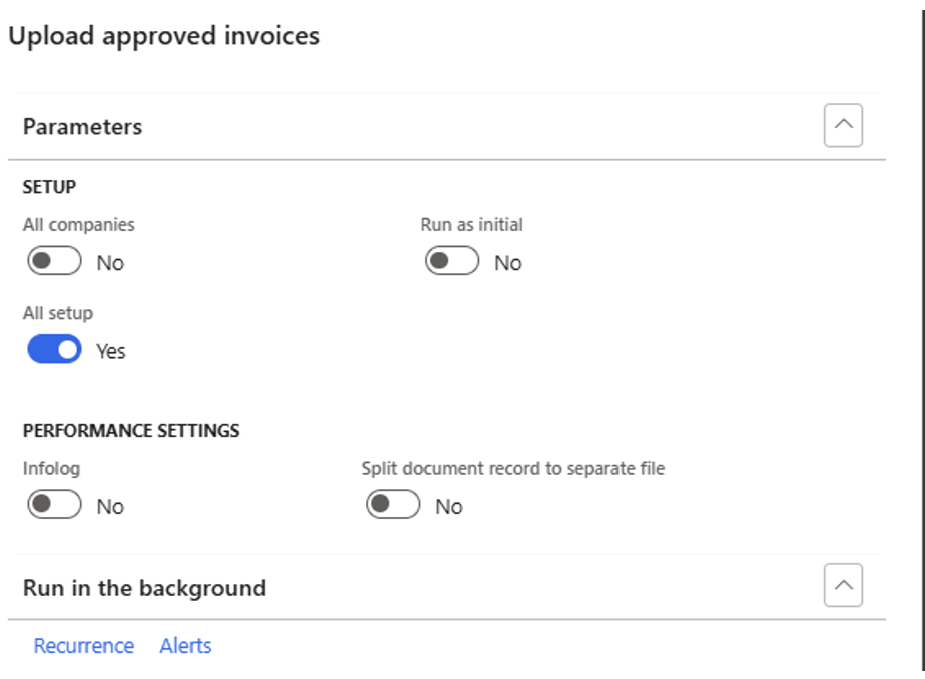
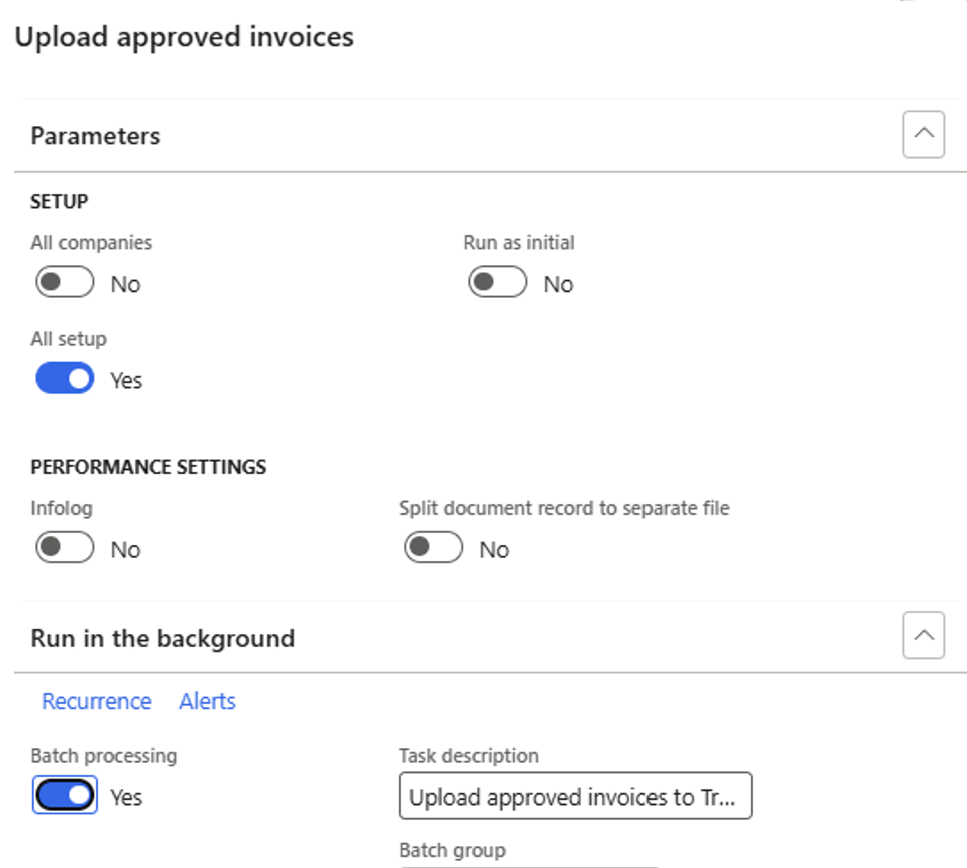
Upload approved invoices
To upload coding data for old invoices, use the job "Upload approved invoices.
ExFlow -> Periodic tasks -> TruvioSense Coding & Approvals -> Upload approved invoices
Settings
- All companies: Run for Active company or all companies.
- Run as initial: Yes – Upload those Processed invoice documents according to defined setting per vendor; No – Upload Unprocessed only.
- All setup = Yes - Only.
- Press “OK” Button.
Data from ExFlow document form (coding) will be uploaded to customer specific Truvio Azure Storage for each invoice document and vendor. Linked by the Document ID.
Upload new data
New incoming data can automatically be upload to the AI services.
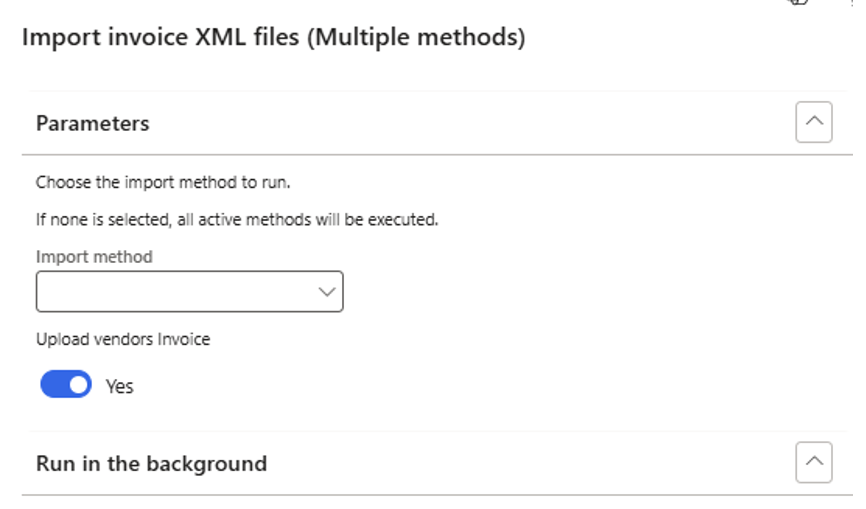
Upload vendor invoices
To upload vendor invoice data automatically adjust the existing batch job or create new ones as following:
ExFlow AP -> Periodic tasks -> Import -> “Import invoice XML files (Multiple methods)”, which is normally scheduled with recurrence in batch.
Settings
- Enable “Upload vendors invoice” toggle.
Approved invoices
To continuously update the AI service with latest coding information per defined vendor; schedule a job (once per day)
ExFlow AP -> Periodic tasks -> TruvioSense Coding & Approvals -> Upload approved invoices.
Settings
- All companies: Run for Active company or all companies.
- Run as initial: Yes – Upload those Processed invoice documents according to defined setting per vendor; No – Upload Unprocessed only.
- All setup = Yes only.